View and filter your customer list
The customer list is the directory of every company you invoice. It shows how many invoices are late, how risky each account looks, where the data came from, and who manages it. This article shows you how to find a customer, narrow the list down, and save the views your team uses every day.
Before you start
- Your customers arrive automatically once an accounting connector is set up. You can also import them from a CSV file or create them one at a time.
- The list is available to any user with permission to view customers. If the Customers entry is missing from the left menu, ask your administrator to grant you access.
Open the customer list
- In the left menu, under Customer accounts, click Customers.
- The list opens on the All Customers tab, sorted by name.
- Use Search by customer at the top right of the table to find a company by name.
- Click a row to open that customer's file.
- At the bottom of the table, choose how many rows to display: 25, 50, or 100.
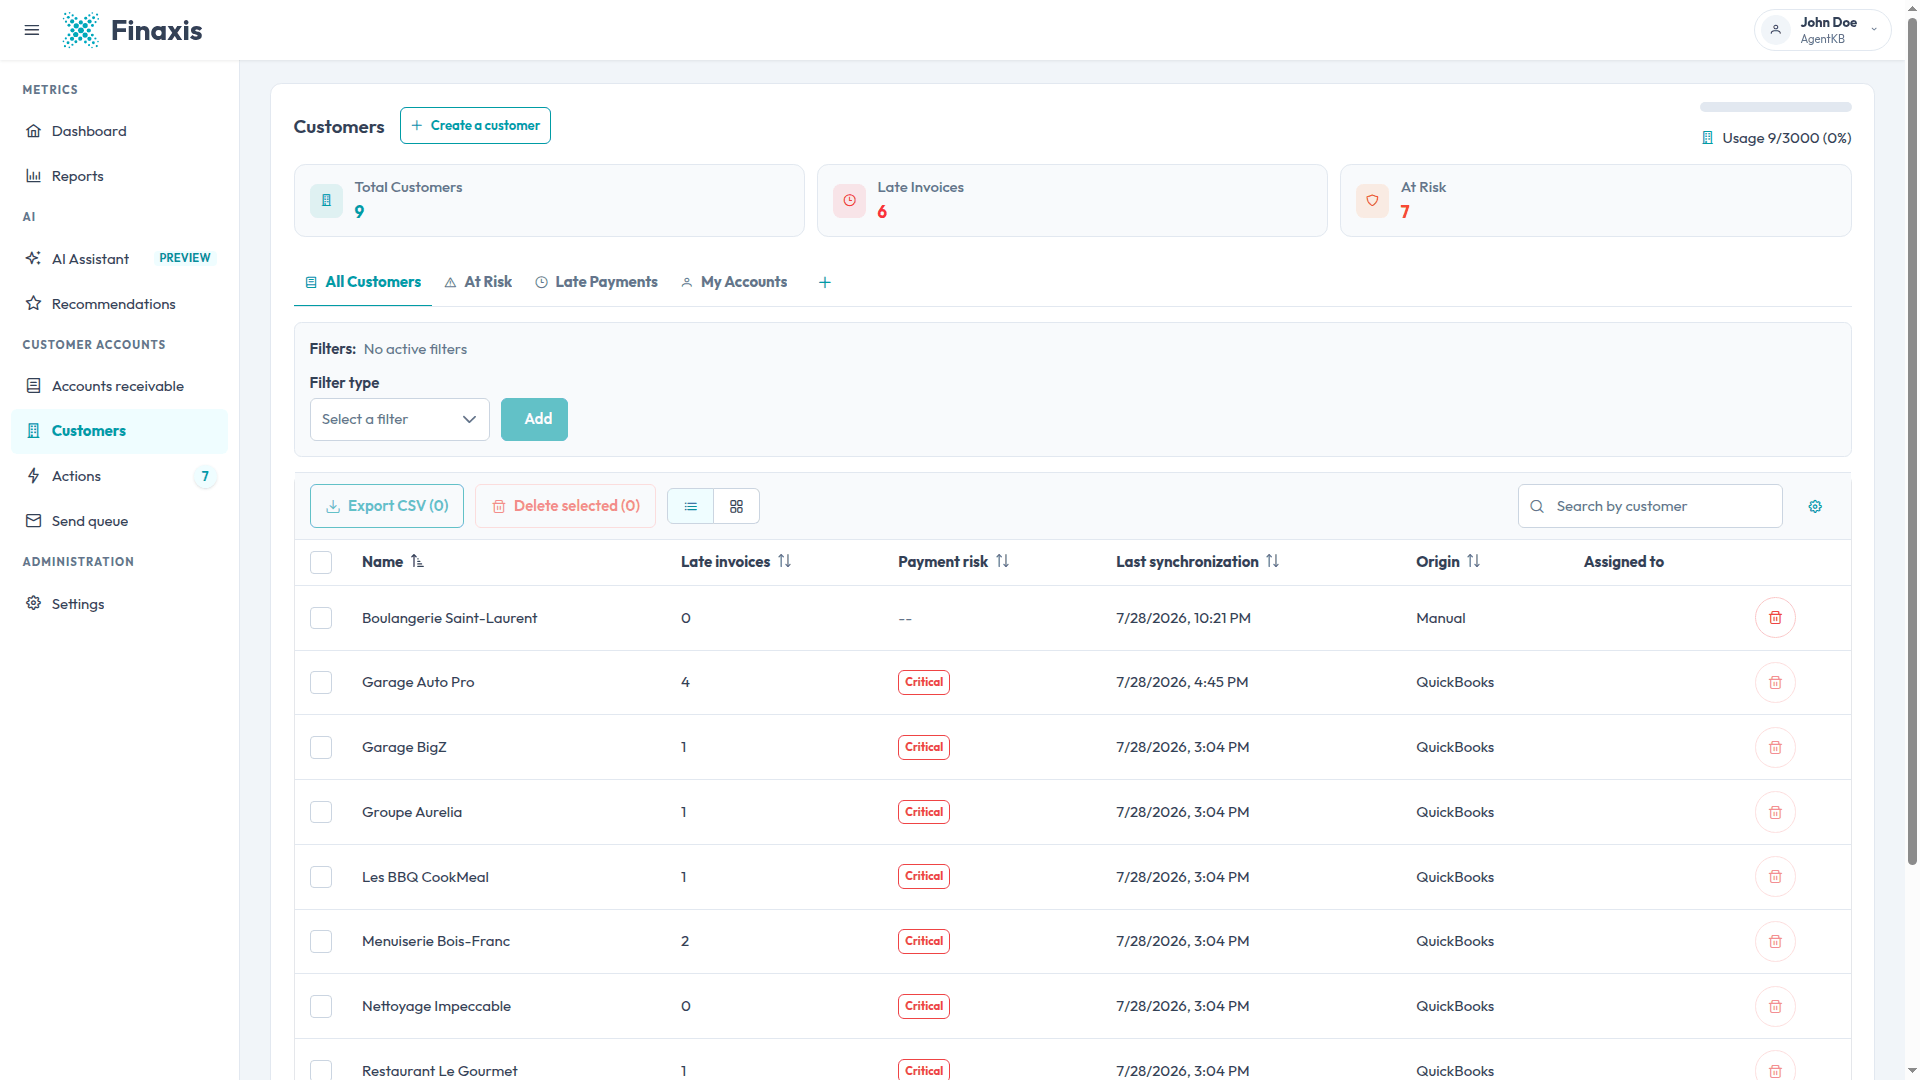
Please note: The counter at the top right of the page shows how many customers you currently use out of the limit included in your plan.
Read the summary cards
Three cards above the table summarize what you are looking at. They always reflect the rows currently displayed, so they update as soon as you apply a filter or switch tabs.
- Total Customers: the number of customers in the current view.
- Late Invoices: the number of customers with at least one late invoice, not the total count of late invoices.
- At Risk: the number of customers whose payment risk is Critical or High.
Use the built-in tabs
Four tabs sit above the filter panel and apply a ready-made filter in one click.
| Tab | What it shows |
|---|---|
| All Customers | Every customer, with no filter applied. |
| At Risk | Customers whose payment risk is Critical or High. |
| Late Payments | Customers with at least one late invoice. |
| My Accounts | Customers assigned to you as account manager. |
Filter the list
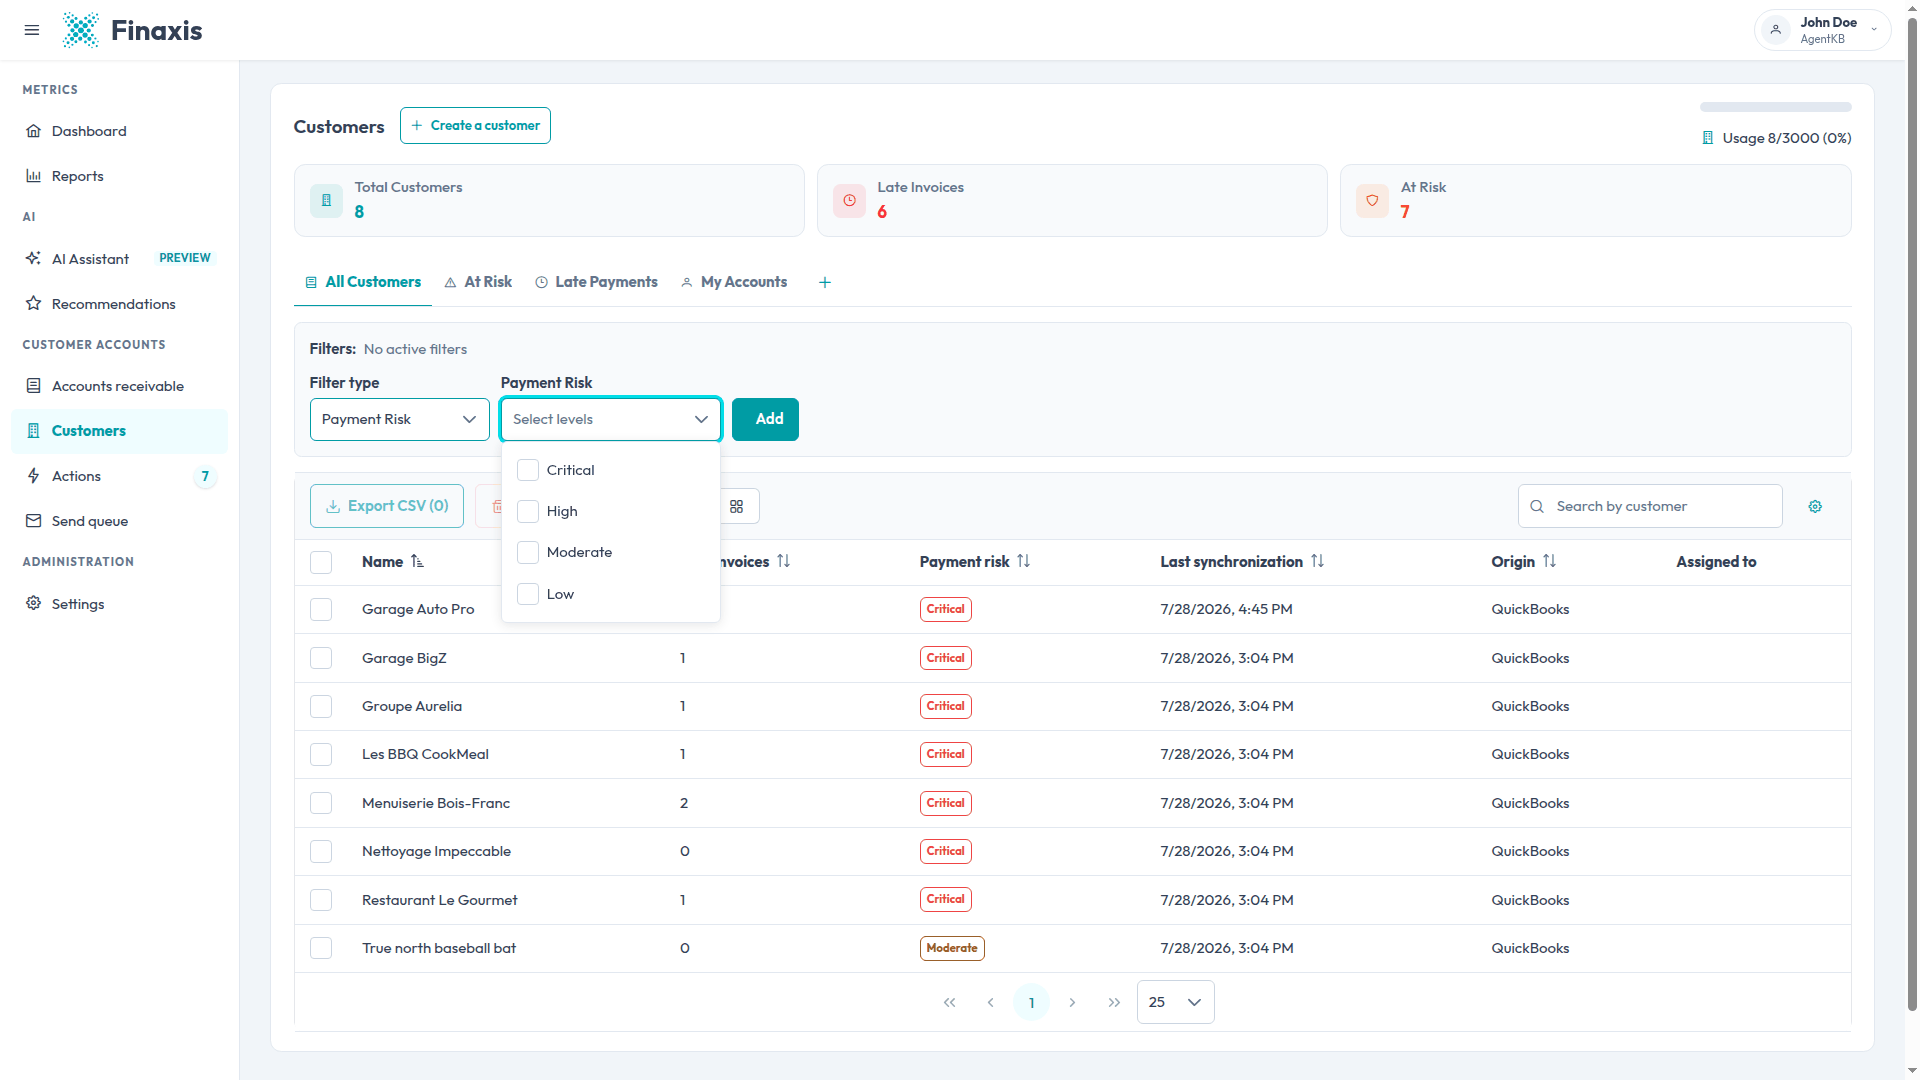
- In the Filter type field, choose the kind of filter you want to add.
- Fill in the second field that appears, for example the risk levels or the data sources you want to keep.
- Click Add. The filter appears next to Filters: and the table updates immediately.
- Repeat to stack several filters. A customer has to match all of them to stay in the list.
- To remove a filter, click the small cross on its label.
| Filter type | What you can select |
|---|---|
| Payment Risk | One or more levels: Critical, High, Moderate, Low. |
| With late invoices | Nothing to select. Keeps only customers with at least one late invoice. |
| Assigned to | A member of your team, to see the accounts that person manages. |
| Data source | QuickBooks, Acomba, CSV file, or Manual. |
Save a view you use often
Once your filters are set, save the combination so you can return to it in one click. Saved views appear as extra tabs next to the built-in ones.
- Apply the filters you want to keep.
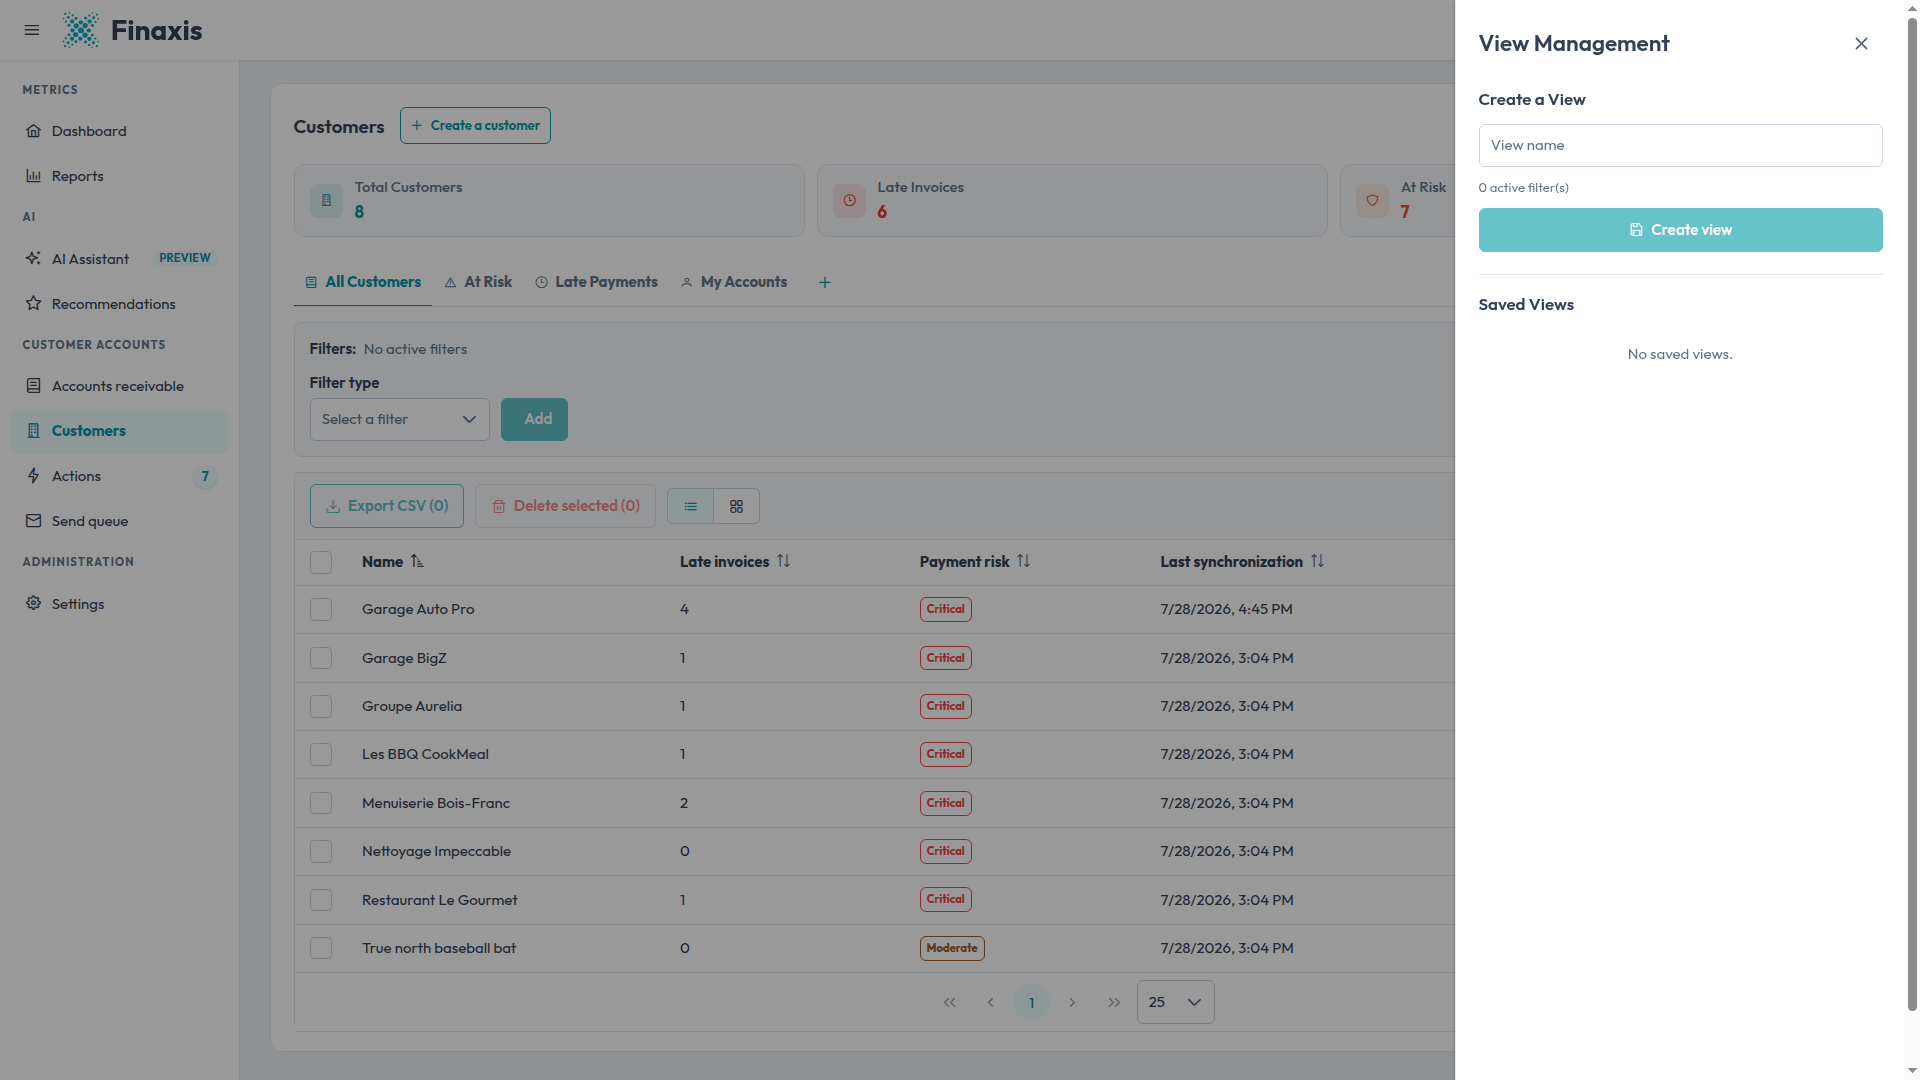
- Click the + tab at the end of the tab bar. The View Management panel opens.
- Type a name in View name. The panel confirms how many filters the view will store.
- Click Create view. The new view becomes the active tab.
- To reopen or delete a view later, click the + tab again and pick it under Saved Views.
Choose the columns you see
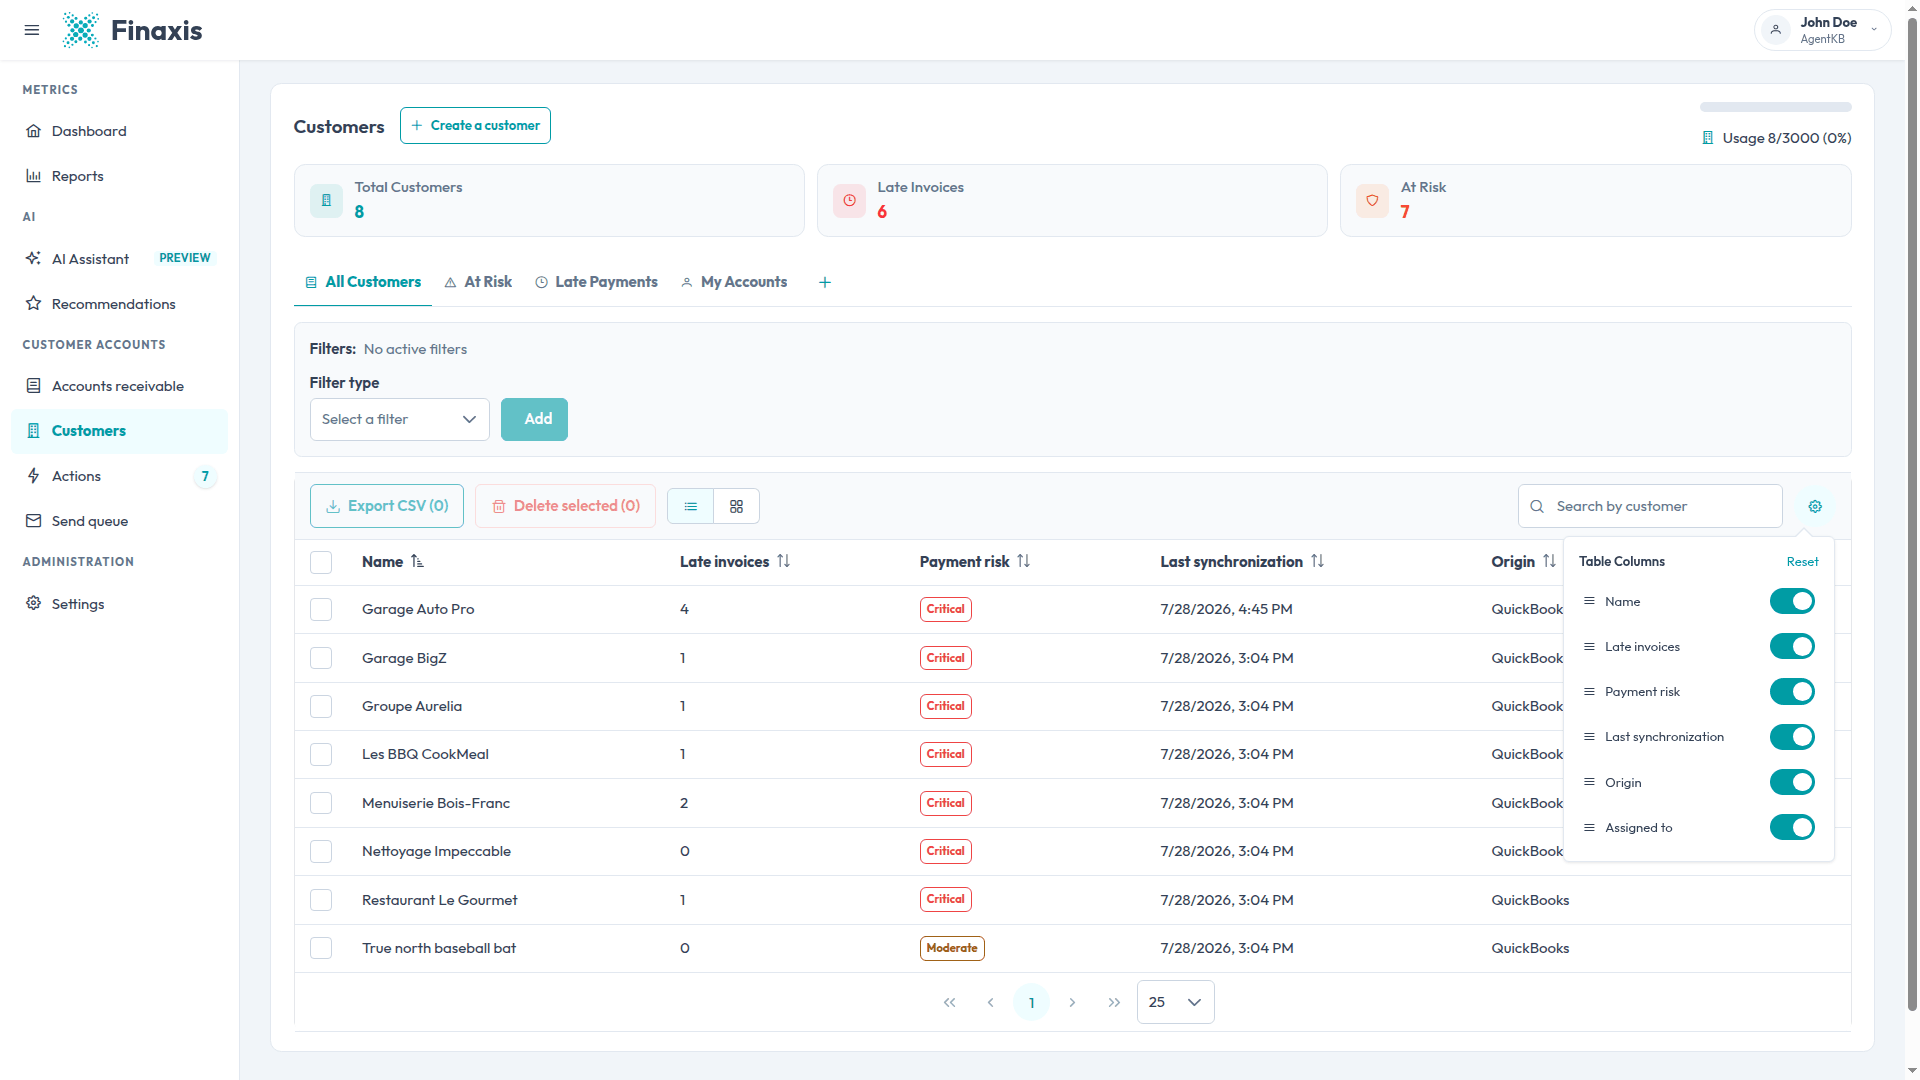
- Click the gear icon at the right of the search field.
- In the Table Columns panel, turn a column off or on with its switch.
- Drag a row by its handle to change the column order.
- Click Reset to go back to the default columns.
Please note: Your column choices are kept on this browser only. Colleagues keep their own layout.
Switch to the kanban view
The kanban view groups your customers into risk columns, which makes it easier to see where the pressure is. Filters and tabs stay active when you switch.
- Click the grid icon next to the Export CSV button.
- Read the columns from left to right: High Risk, Moderate Risk, Low Risk, Good Payer, and Unrated.
- Sort the cards with Alphabetical or Amount due at the top right.
- Click a card to open that customer's file.
- Click the list icon to go back to the table.
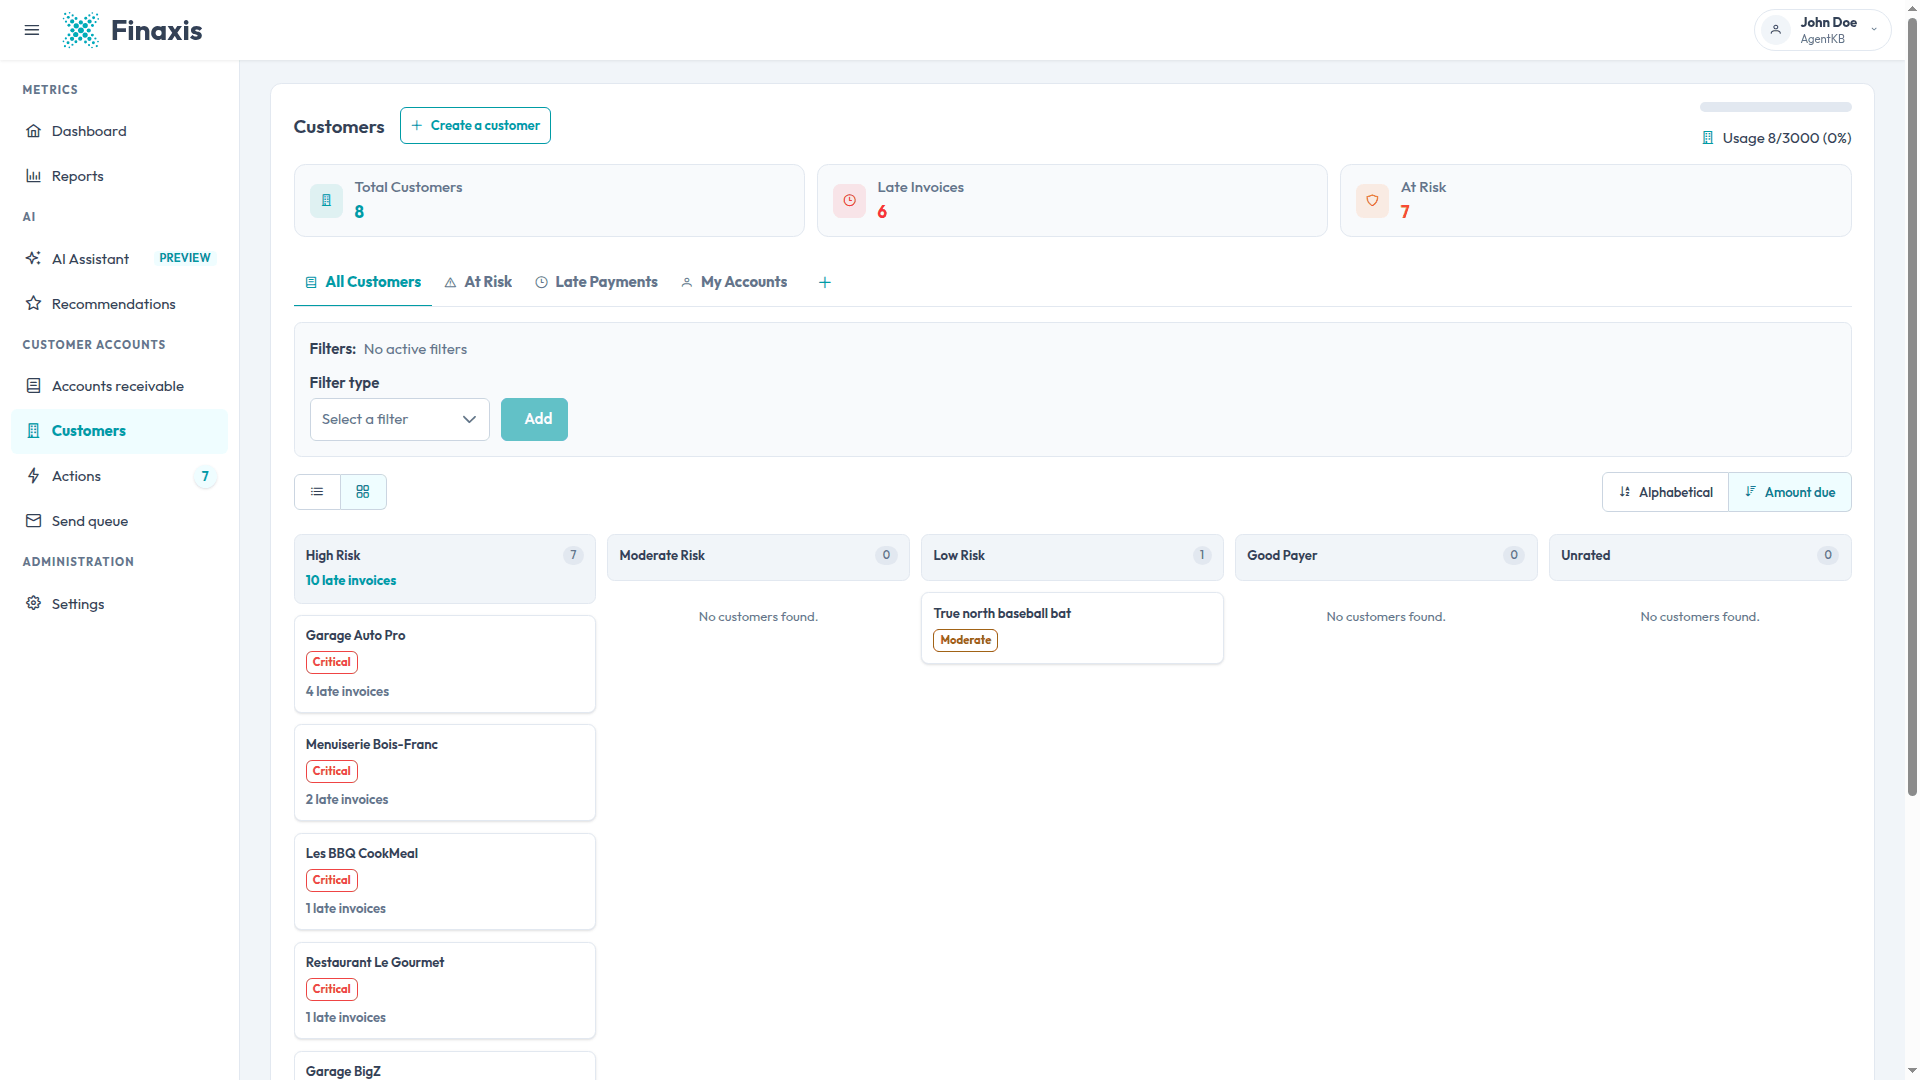
Please note: A customer stays in Unrated until Finaxis has enough payment history to score it. New customers and customers with no invoices normally land there.
Export the list to CSV
- Select the customers you want with the checkboxes at the left of each row, or use the checkbox in the header to select the whole page.
- Click Export CSV. The button shows how many customers are selected.
- The file downloads to your computer with the columns currently displayed.
Troubleshoot the customer list
| Situation | What to do |
|---|---|
| A customer is missing from the list | Check that no filter or saved view is still active, then confirm the customer was included in the selection made when the connector was set up. |
| The Payment risk column shows two dashes | Finaxis has not scored the account yet. The score appears once the customer has invoices and payment history. |
| The delete icon is greyed out on a row | Only customers created manually or imported from a CSV file can be deleted. Customers synchronized from an accounting system are removed at the source. |
| The Last synchronization date looks old | The date comes from the connector that owns the customer. Open Settings, then Integrations, to check the state of that connection. |
| My Accounts is empty | No customer is assigned to you yet. An administrator assigns account managers from the customer file or from the assignment page. |
Still cannot find what you are looking for? Write to support@finaxis.ai and our team will help you.
Related articles
Can't find what you're looking for?
Our support team is here to help.