Create a customer manually
Most of your customers arrive automatically from your accounting software. When a company is not there, for example a new client invoiced outside your usual system, you can create it directly in Finaxis in under a minute.
Before you start
- You need permission to create customers. If the Create a customer button does not appear, ask your administrator.
- If the company already exists in QuickBooks or Acomba, let the connector import it instead. A synchronized customer keeps its data in step with your accounting.
- Each customer counts toward the customer limit included in your plan. The counter at the top right of the customer list shows where you stand.
Create the customer
- In the left menu, under Customer accounts, click Customers.
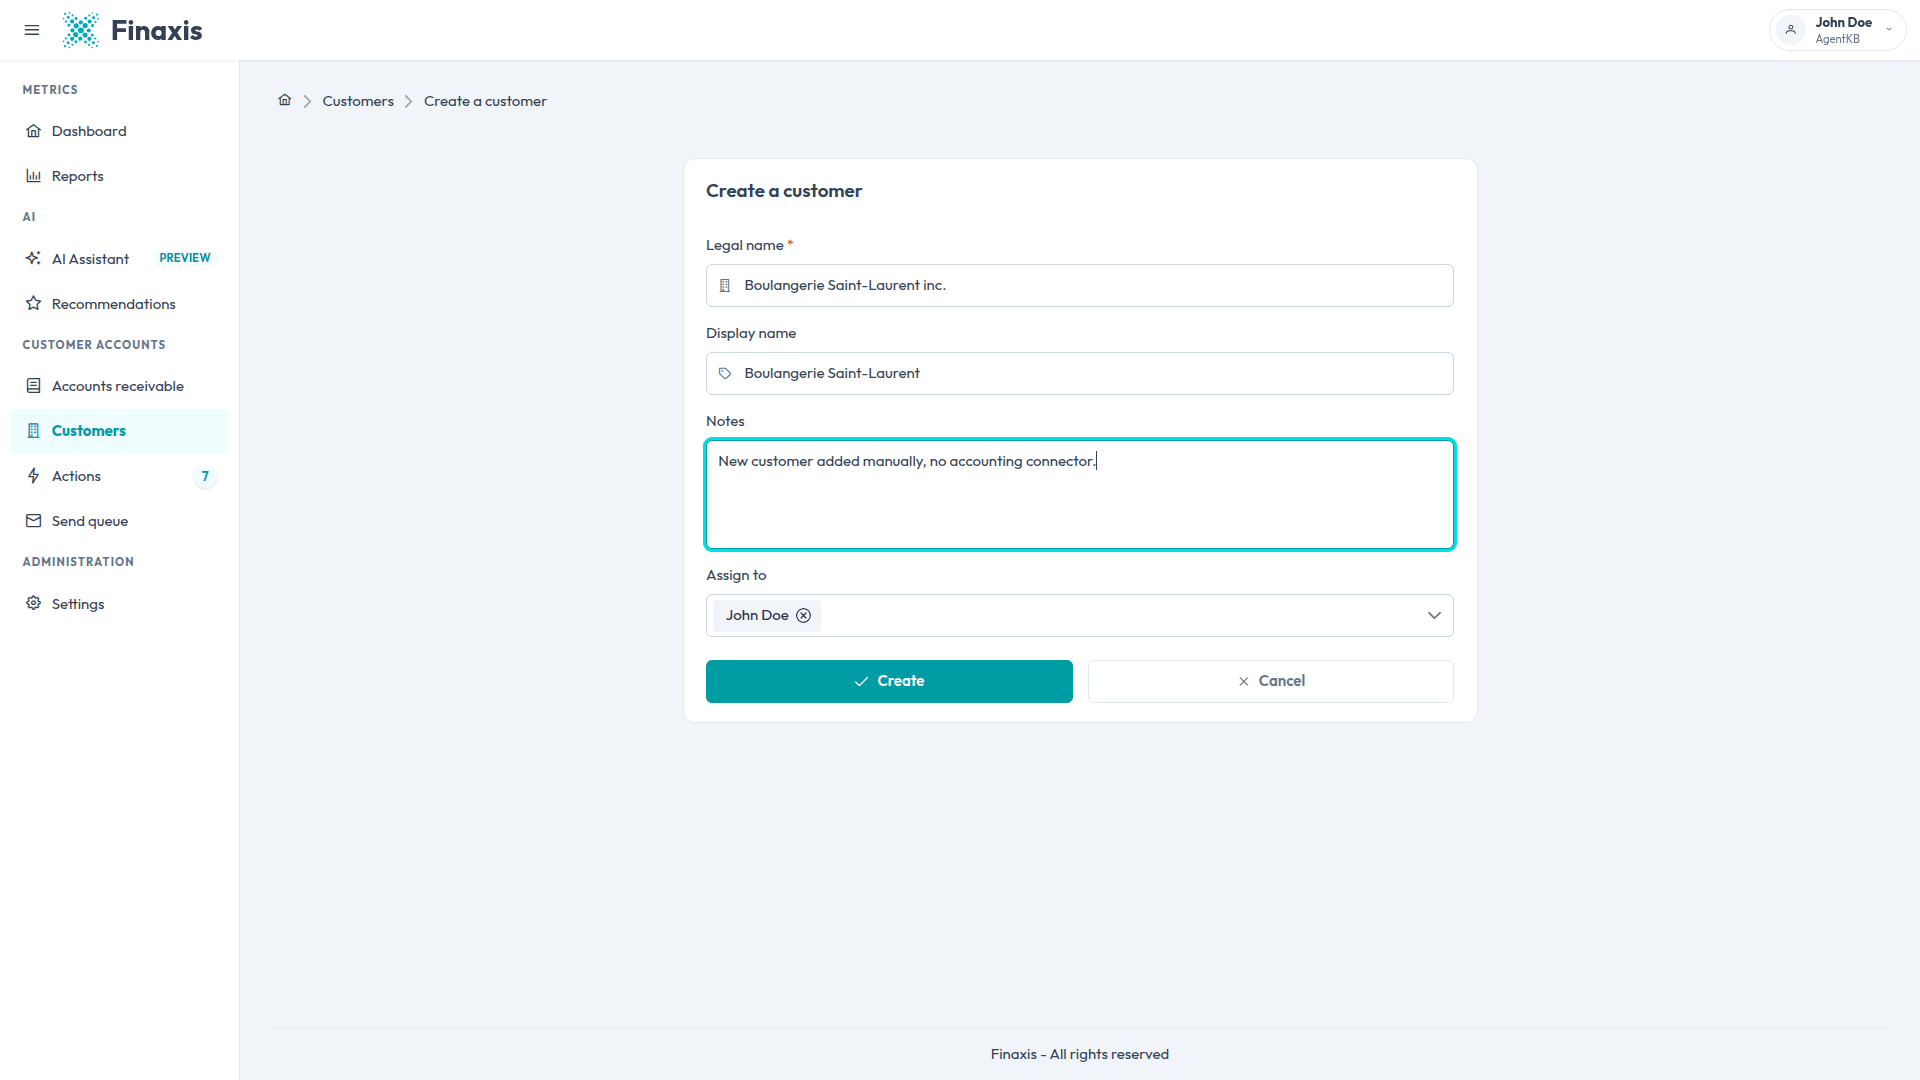
- At the top of the page, click Create a customer.
- In Legal name, enter the company's official name. This field is required.
- In Display name, enter a shorter name if you prefer. Finaxis then shows this name everywhere instead of the legal name.
- In Notes, add any internal context your team should see on the file.
- In Assign to, pick the account managers responsible for this customer. Your own name is preselected.
- Click Create.
Please note: Finaxis rejects a legal name that is already used by another customer, so you do not end up chasing the same company twice.
What happens next
Finaxis opens the new customer file right away. The header shows a Manual tag, which tells everyone the record is not tied to an accounting connector, along with the reminder plan the customer follows.
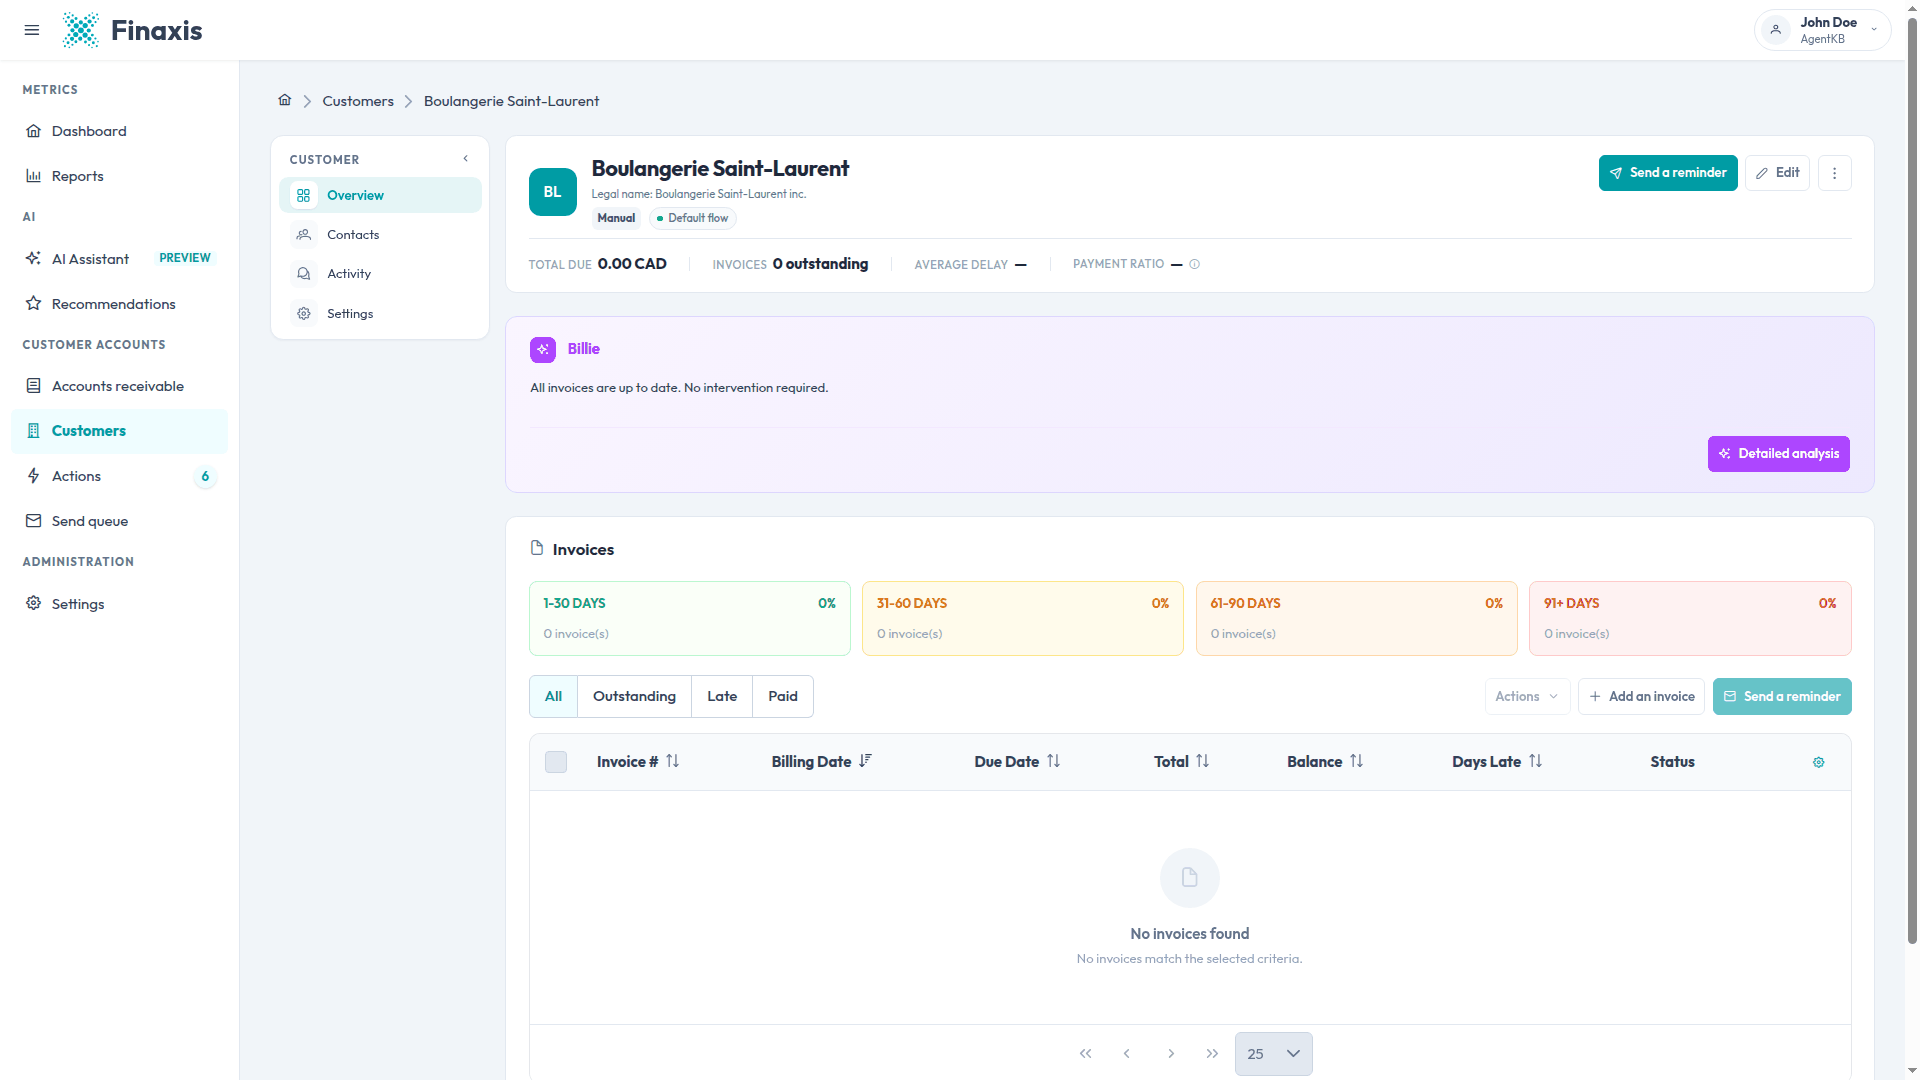
- The balance starts at zero and stays there until you add invoices.
- The payment risk is empty until Finaxis has enough payment history to score the account.
- A manual customer stays fully editable, unlike a customer synchronized from an accounting system.
- A manual customer can be deleted from the customer list when you no longer need it.
Complete the file
The creation form keeps only the essentials. Everything else lives on the customer's Edit page.
- On the customer file, click Edit at the top right.
- Add at least one contact with an email address or a phone number. Without a contact, Finaxis has nowhere to send a reminder.
- Set the Payment terms that apply to this customer, from payment on receipt to Net 90.
- Check the reminder plan under Workflow and turn it off if this customer should not be followed up automatically.
- Click Save changes.
You can then record the invoices this customer owes you from the Invoices section of the file, with Add an invoice.
Troubleshoot customer creation
| Situation | What to do |
|---|---|
| "A customer with this legal name already exists" | Search the customer list for that name. The company is probably already there, imported by a connector or created by a colleague. |
| The Create button stays greyed out | The legal name is empty. It is the only required field on the form. |
| The customer you created is a duplicate of a synchronized one | Delete the manual record from the customer list and keep the synchronized one, which stays up to date on its own. |
| You have reached your customer limit | Remove customers you no longer follow, or contact us to move to a plan with a higher limit. |
Need a hand setting up a customer? Write to support@finaxis.ai and our team will help you.
Related articles
Can't find what you're looking for?
Our support team is here to help.