Edit a customer and its contacts
The Edit page of a customer holds everything Finaxis needs to follow up properly: who to write to, in which language, on what payment terms, and under which reminder plan. This article walks through each section and explains why some fields are read-only.
Before you start
- You need permission to update customers. If the Edit button does not appear on the customer file, ask your administrator.
- Finaxis reads your accounting data one way only. Editing a customer here never writes anything back to QuickBooks or Acomba.
Open the edit page
- In the left menu, under Customer accounts, click Customers.
- Click the customer you want to update.
- At the top right of the file, click Edit.
- Make your changes. A bar appears at the bottom of the page as soon as something is unsaved.
- Click Save changes. Finaxis returns you to the customer file.
Please note: If you leave the page with unsaved changes, Finaxis asks you to confirm before discarding them.
Set the reminder plan
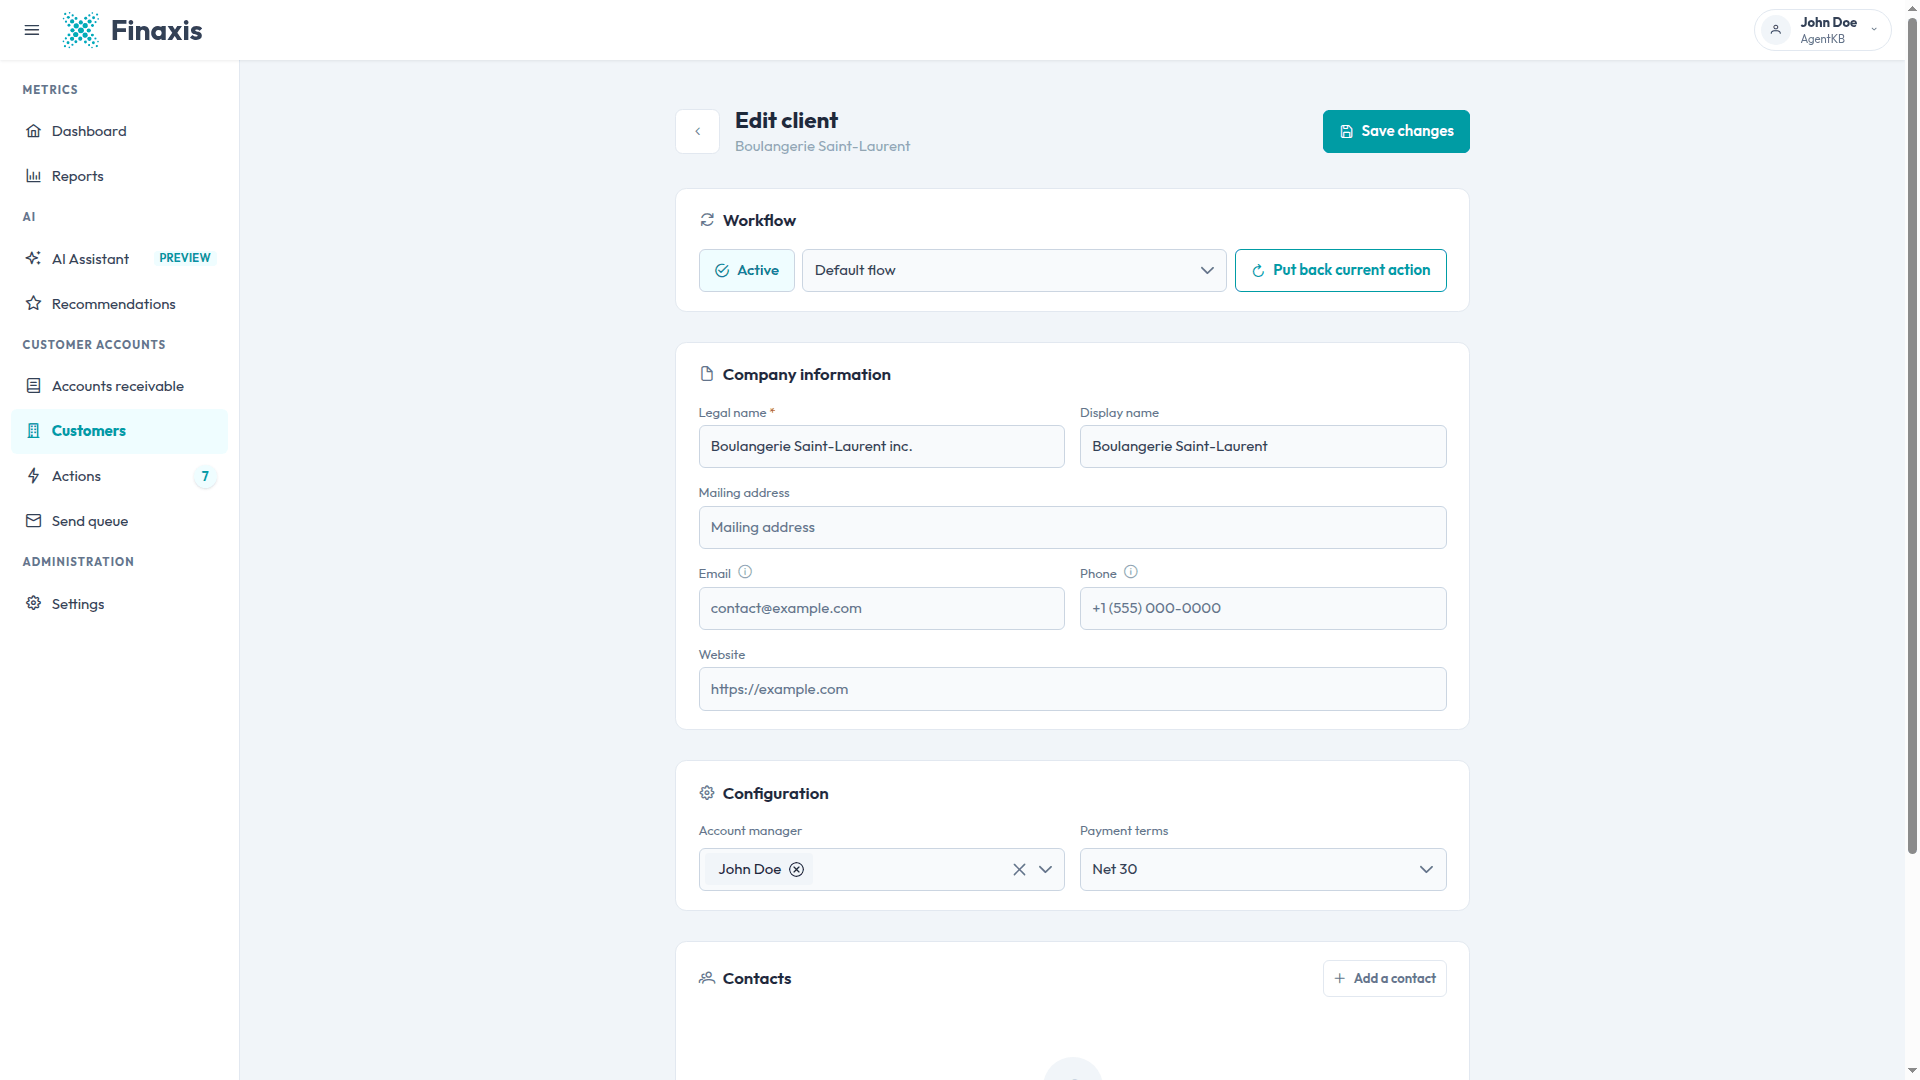
The Workflow section at the top controls how this customer is followed up.
- The Active switch turns automatic follow-ups on or off for this customer. Turn it off for an account handled outside Finaxis, for example one in the hands of a collection agency.
- The dropdown next to it selects the reminder plan the customer follows.
- Put back current action restores the follow-up that was prepared for this customer, when it was dismissed by mistake.
Update the company information
The Company information section holds the identity of the company: Legal name, Display name, Mailing address, Email, Phone, and Website. The display name is what Finaxis shows everywhere in the interface, so use it when the legal name is long or unfamiliar to your team.
Please note: On a customer synchronized from QuickBooks or Acomba, the Legal name is greyed out. It belongs to your accounting software, which stays the source of truth. Change it there and the next synchronization brings the new name over.
Assign the account and the payment terms
The Configuration section carries two settings that shape day-to-day work.
- Account manager: the team members responsible for this customer. They see the account under the My Accounts tab of the customer list.
- Payment terms: the delay that applies to this customer, from Payment on receipt to Net 90. Finaxis uses it to work out when an invoice becomes late.
Add a contact
Contacts are the people who receive your follow-ups. A customer with no contact cannot be reminded, so add at least one.
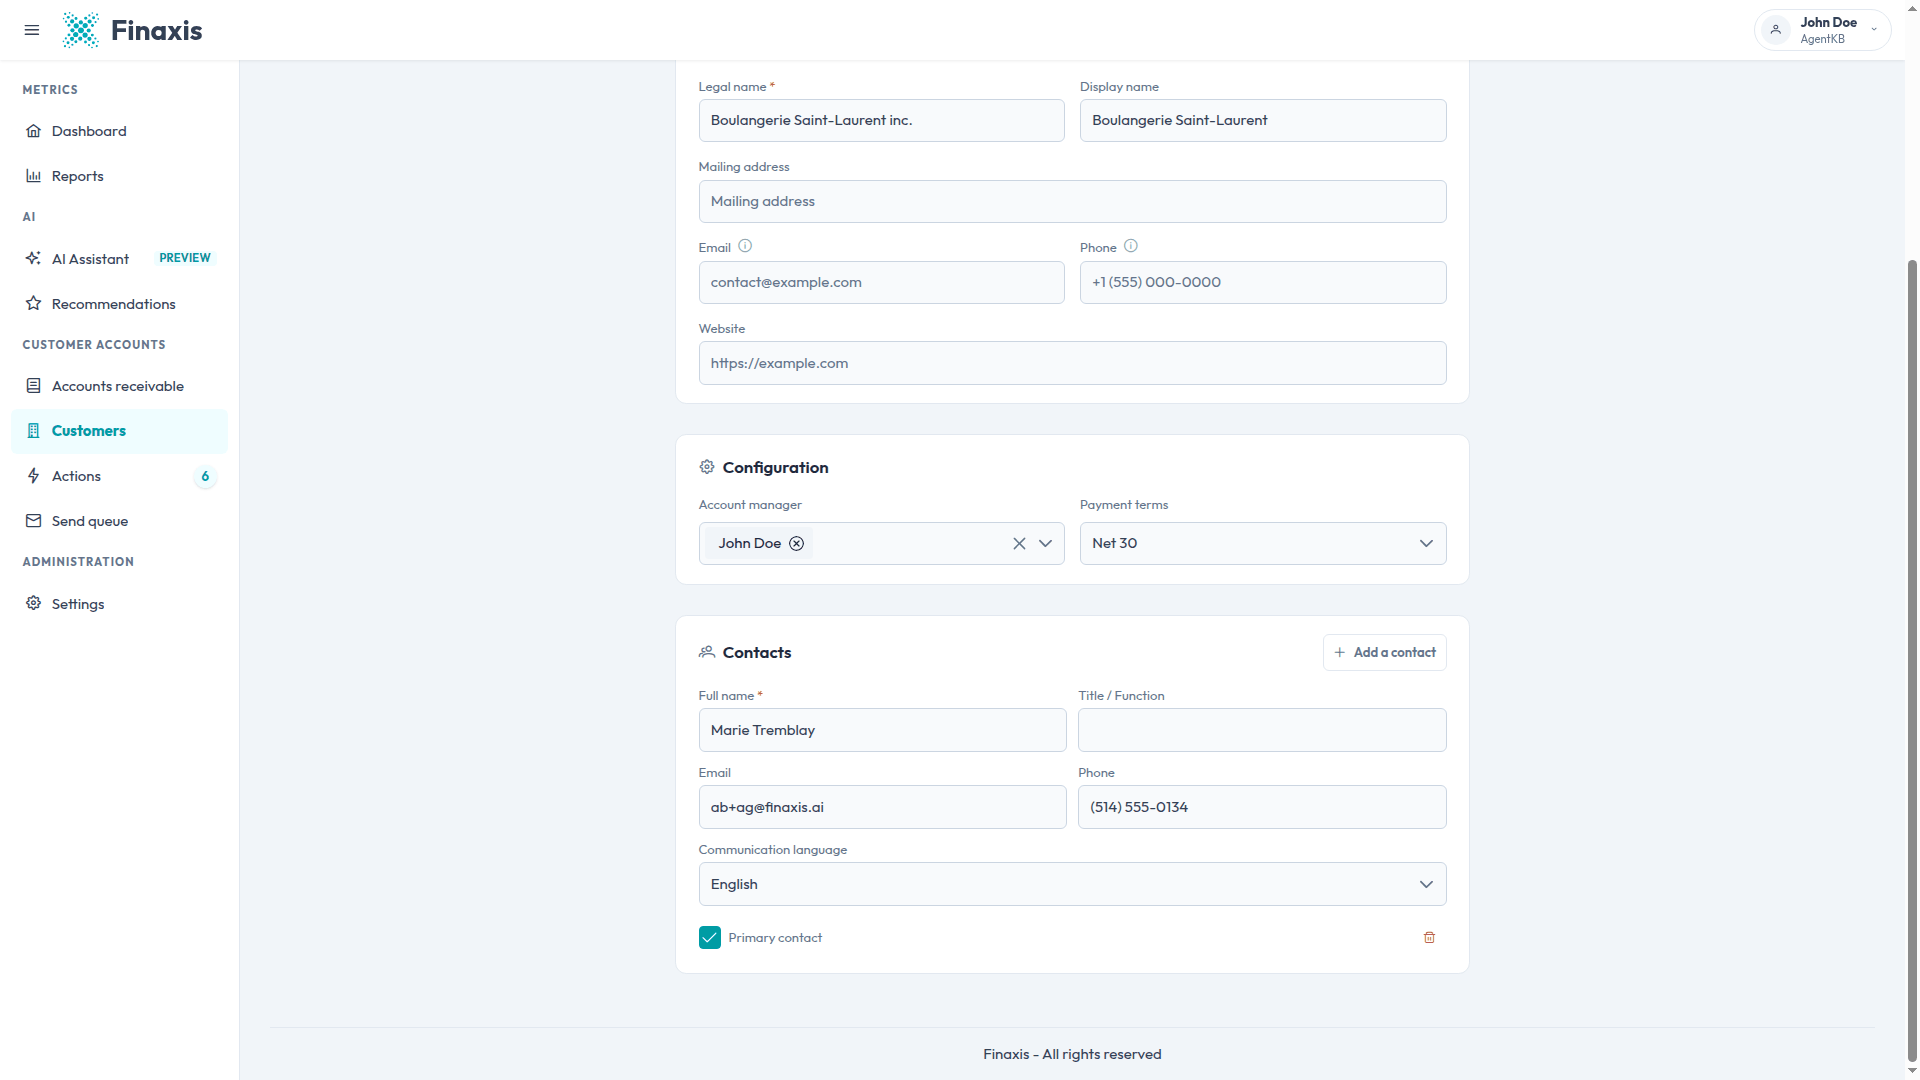
- In the Contacts section, click Add a contact.
- Fill in Full name. This field is required.
- Add an Email, a Phone number, or both. Email carries your reminders, phone carries your text messages.
- Fill in Title / Function so your team knows who they are writing to.
- Choose the Communication language. Finaxis writes every follow-up to this person in that language.
- Check Primary contact if this is the person to reach first. The first contact you add is marked as primary automatically.
- Click Save changes.
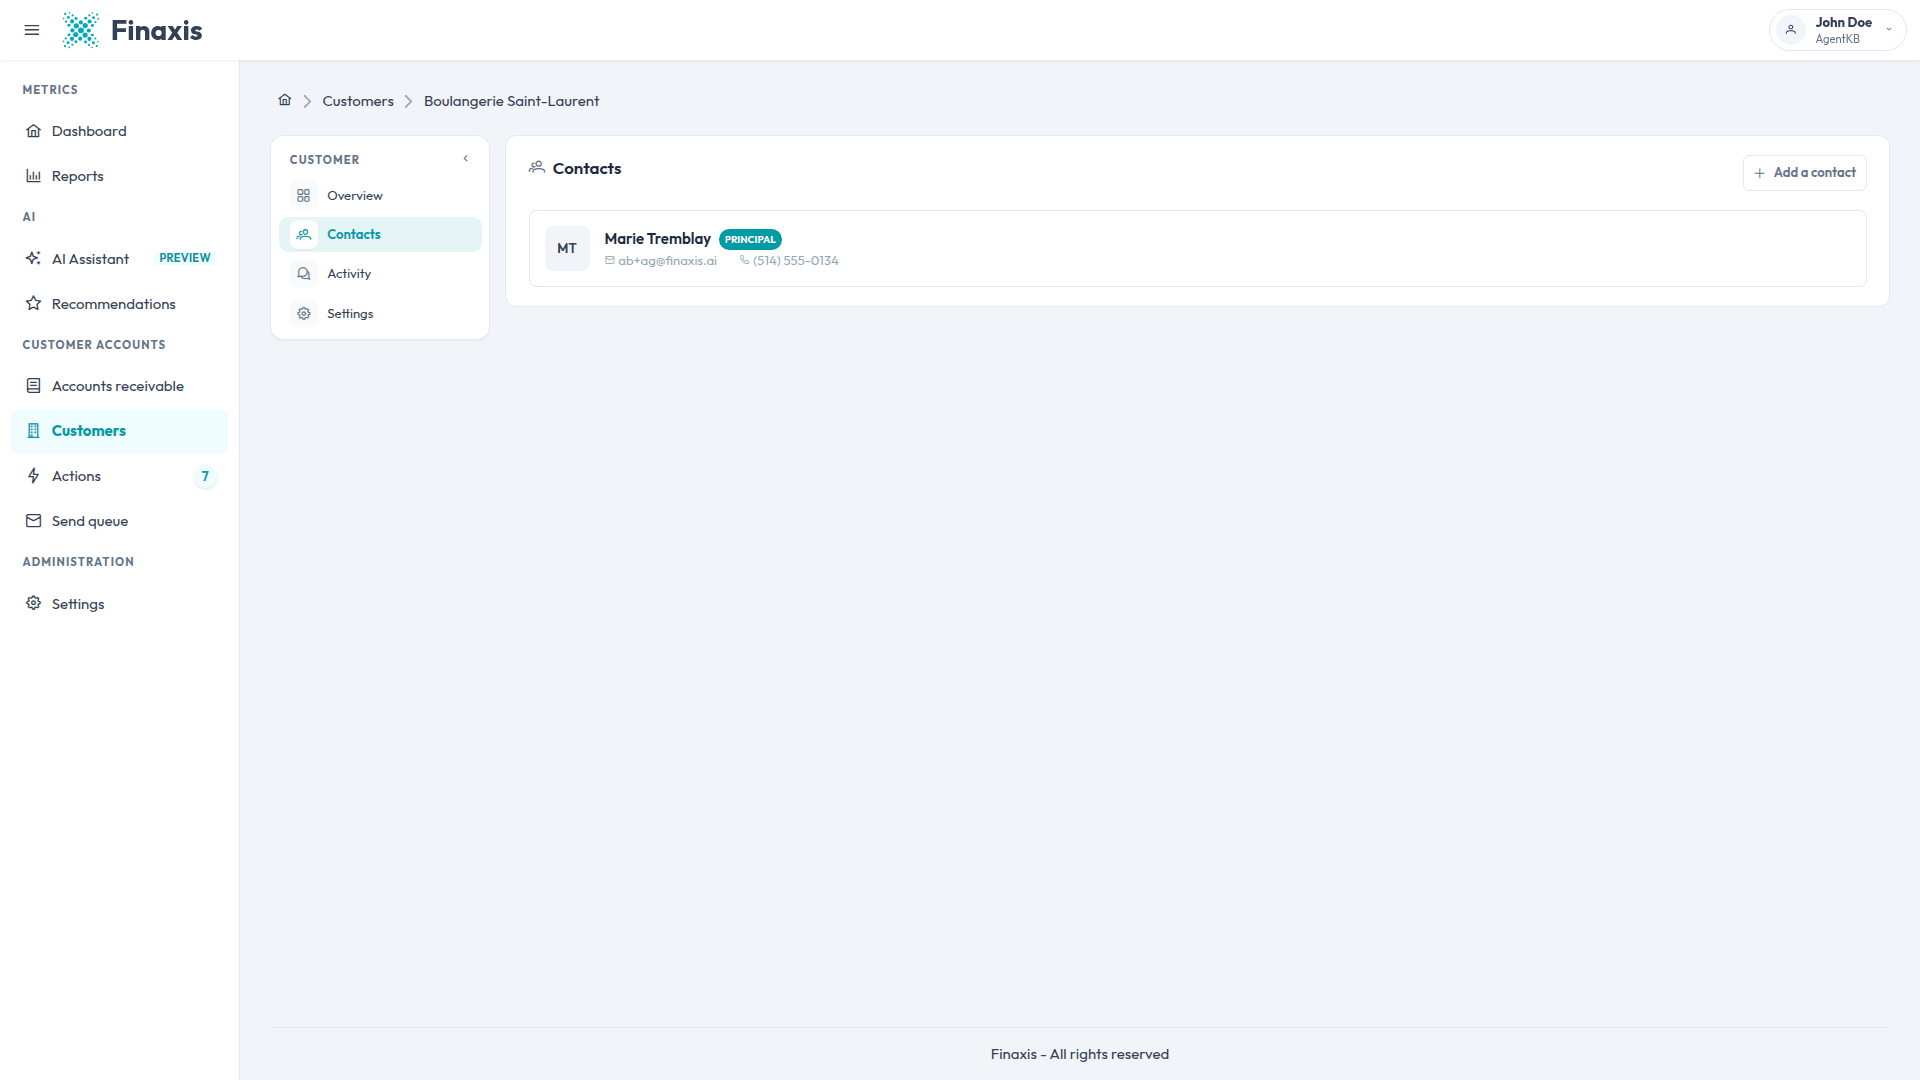
Saved contacts appear on the Contacts tab of the customer file, with the primary contact first.
Work with contacts that come from your accounting software
A contact imported by a connector carries a tag with its origin, for example QuickBooks. Its name, title, email, and phone number are read-only, because the connector refreshes them at every synchronization and would overwrite your edits.
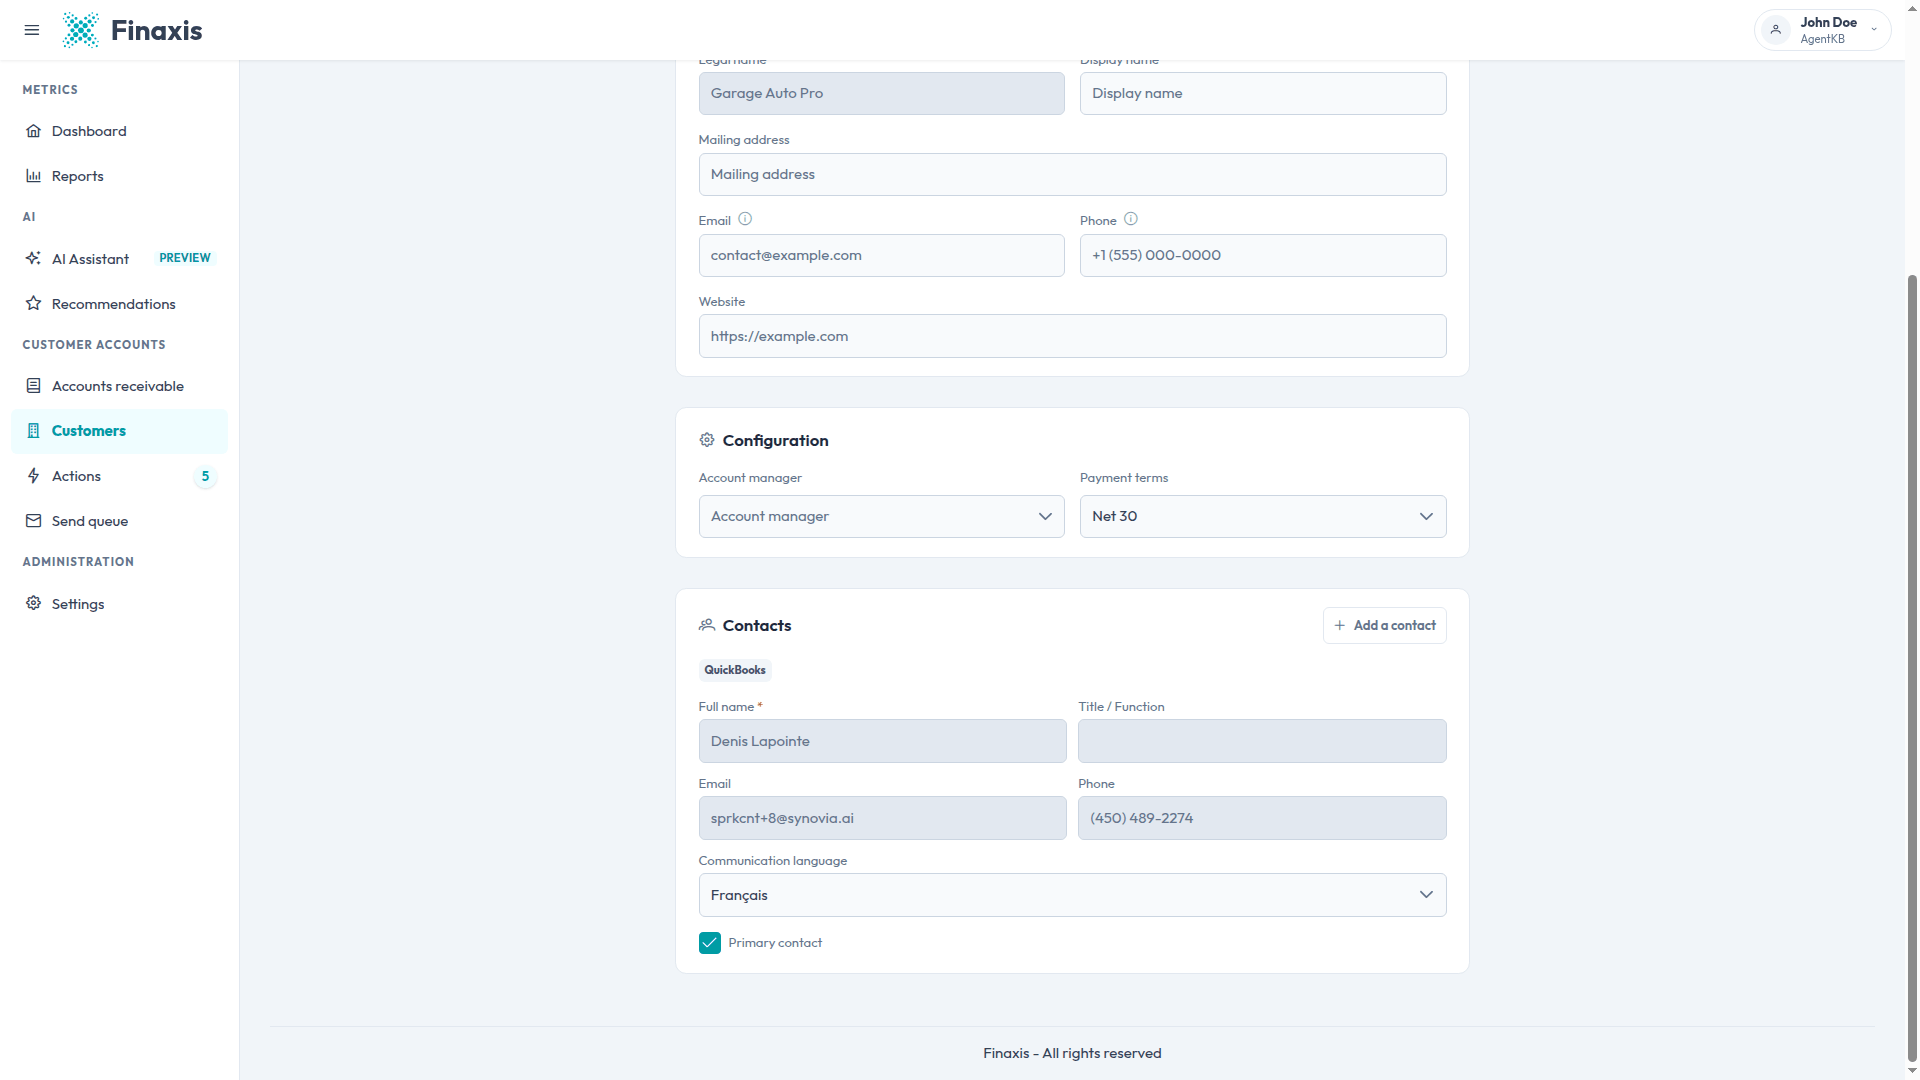
- You can still change the Communication language of a QuickBooks contact. QuickBooks does not carry a reliable language per contact, so Finaxis fills it in once and never overwrites your choice.
- For an Acomba contact, the language comes from the customer's language in Acomba at every synchronization, so the field stays read-only. Change it in Acomba.
- You can always mark an imported contact as the Primary contact.
- To reach someone who is not in your accounting software, add a contact manually alongside the imported ones.
Remove a contact
- On the Edit page, find the contact in the Contacts section.
- Click the trash icon at the bottom right of the contact.
- Click Save changes. If you removed the primary contact, Finaxis promotes the next one in the list.
Troubleshoot customer edits
| Situation | What to do |
|---|---|
| A field is greyed out | It is synchronized from your accounting software. Change it there, then wait for the next synchronization. |
| Save changes does nothing | A required field is empty or badly formatted. Check the legal name and every contact's full name, email, and phone number. |
| A contact you deleted is back after a synchronization | Imported contacts are recreated by the connector. Delete the person in your accounting software instead. |
| Follow-ups go out in the wrong language | The language comes from the contact, not from the customer. Open the contact and correct its communication language. |
| The customer receives no follow-up at all | Check that the switch in the Workflow section is set to Active and that at least one contact has an email address or a phone number. |
Something not behaving as described? Write to [email protected] and our team will help you.
Related articles
Can't find what you're looking for?
Our support team is here to help.