Connect Acomba to Finaxis
The Acomba integration feeds Finaxis automatically: your customers, invoices, and payments are imported every hour by the Acomba Sync application installed on the computer running Acomba. Finaxis reads your Acomba data and never writes anything back to your accounting.
Before you start
- You need administrator access to your Finaxis instance (the Settings menu).
- Acomba must be installed on a Windows computer with internet access; the Acomba Sync application is installed on that same computer.
- Have an Acomba username and password on hand: the application needs them to read your Acomba data.
- The Acomba SDK must be present on that same computer. Acomba Sync detects it on its own in most installations.
Activate the Acomba integration
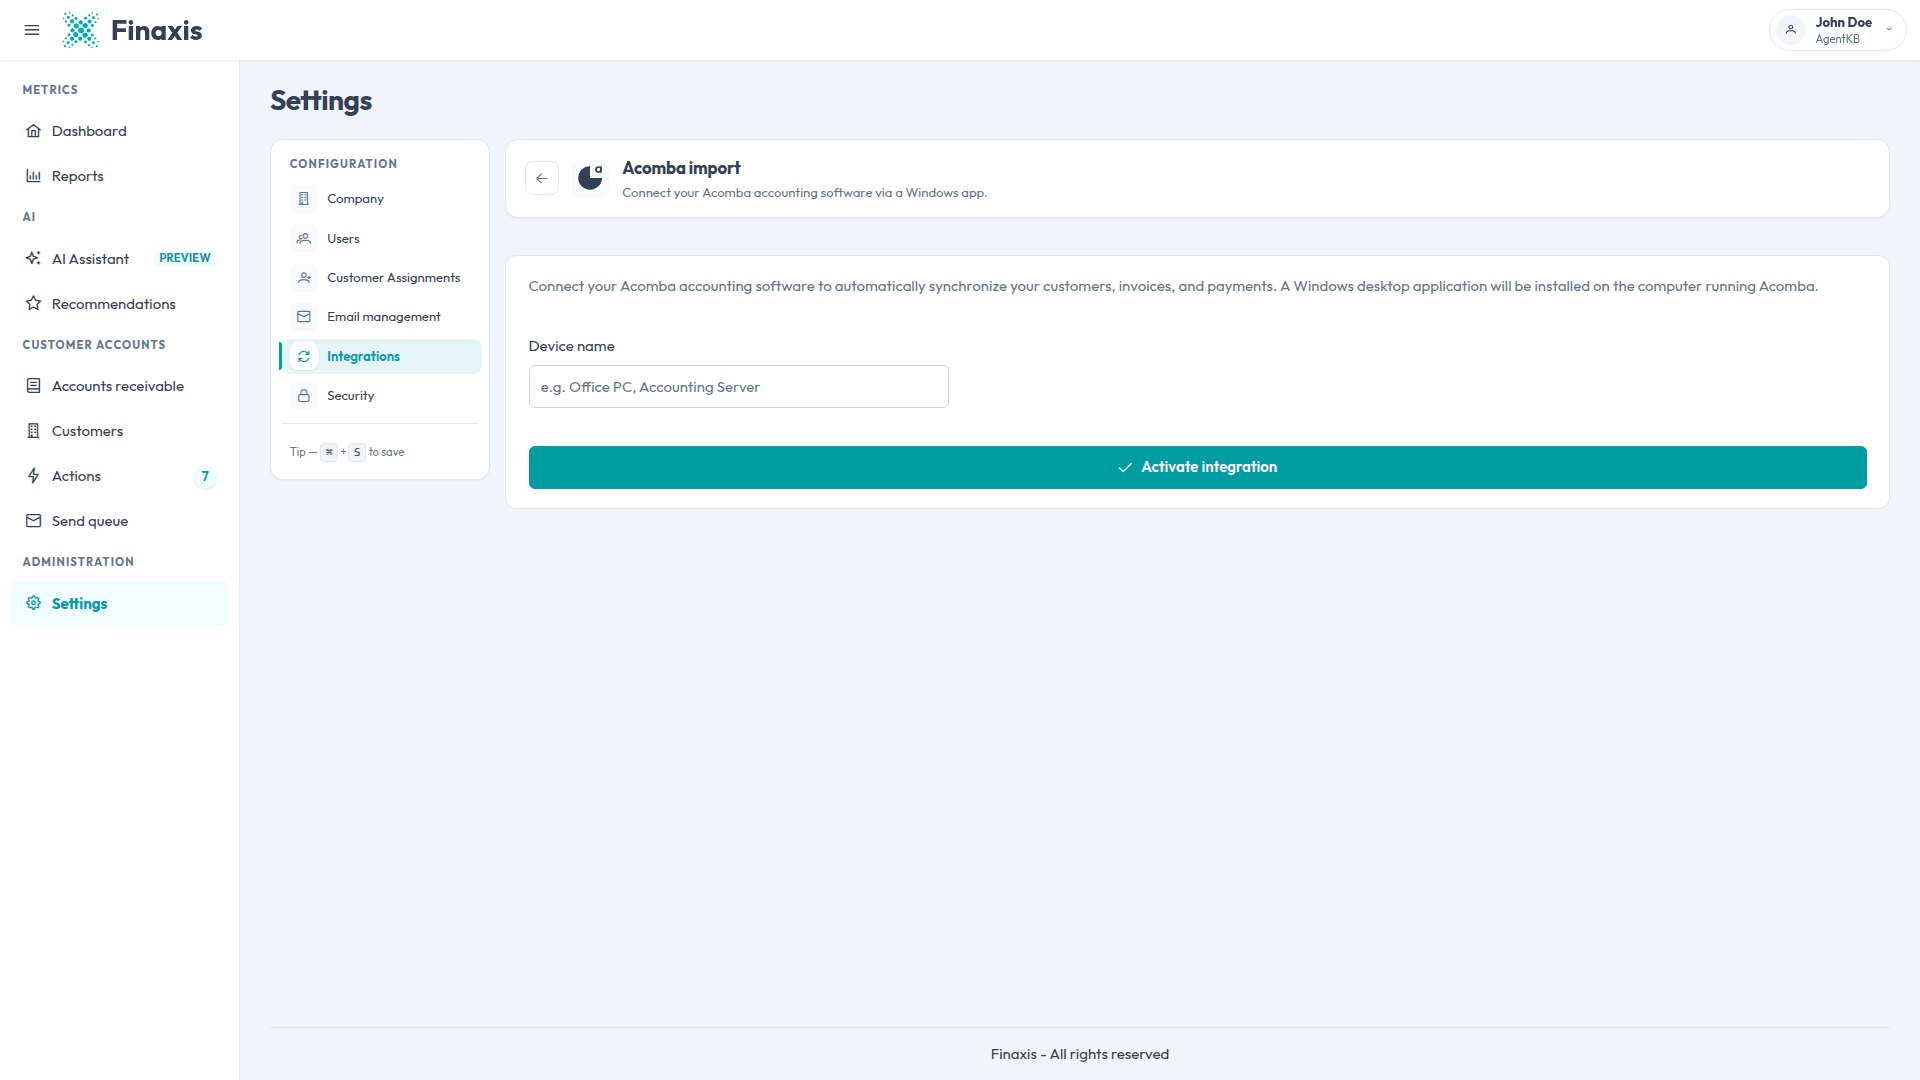
- In the left menu, click Settings, then open the Integrations tab. The Data sources page opens.
- Under Accounting, click Connect on the Acomba card. The Acomba import page opens.
- Enter a Device name that identifies the computer running Acomba, for example Accounting PC.
- Click Activate integration.
Save your device credentials
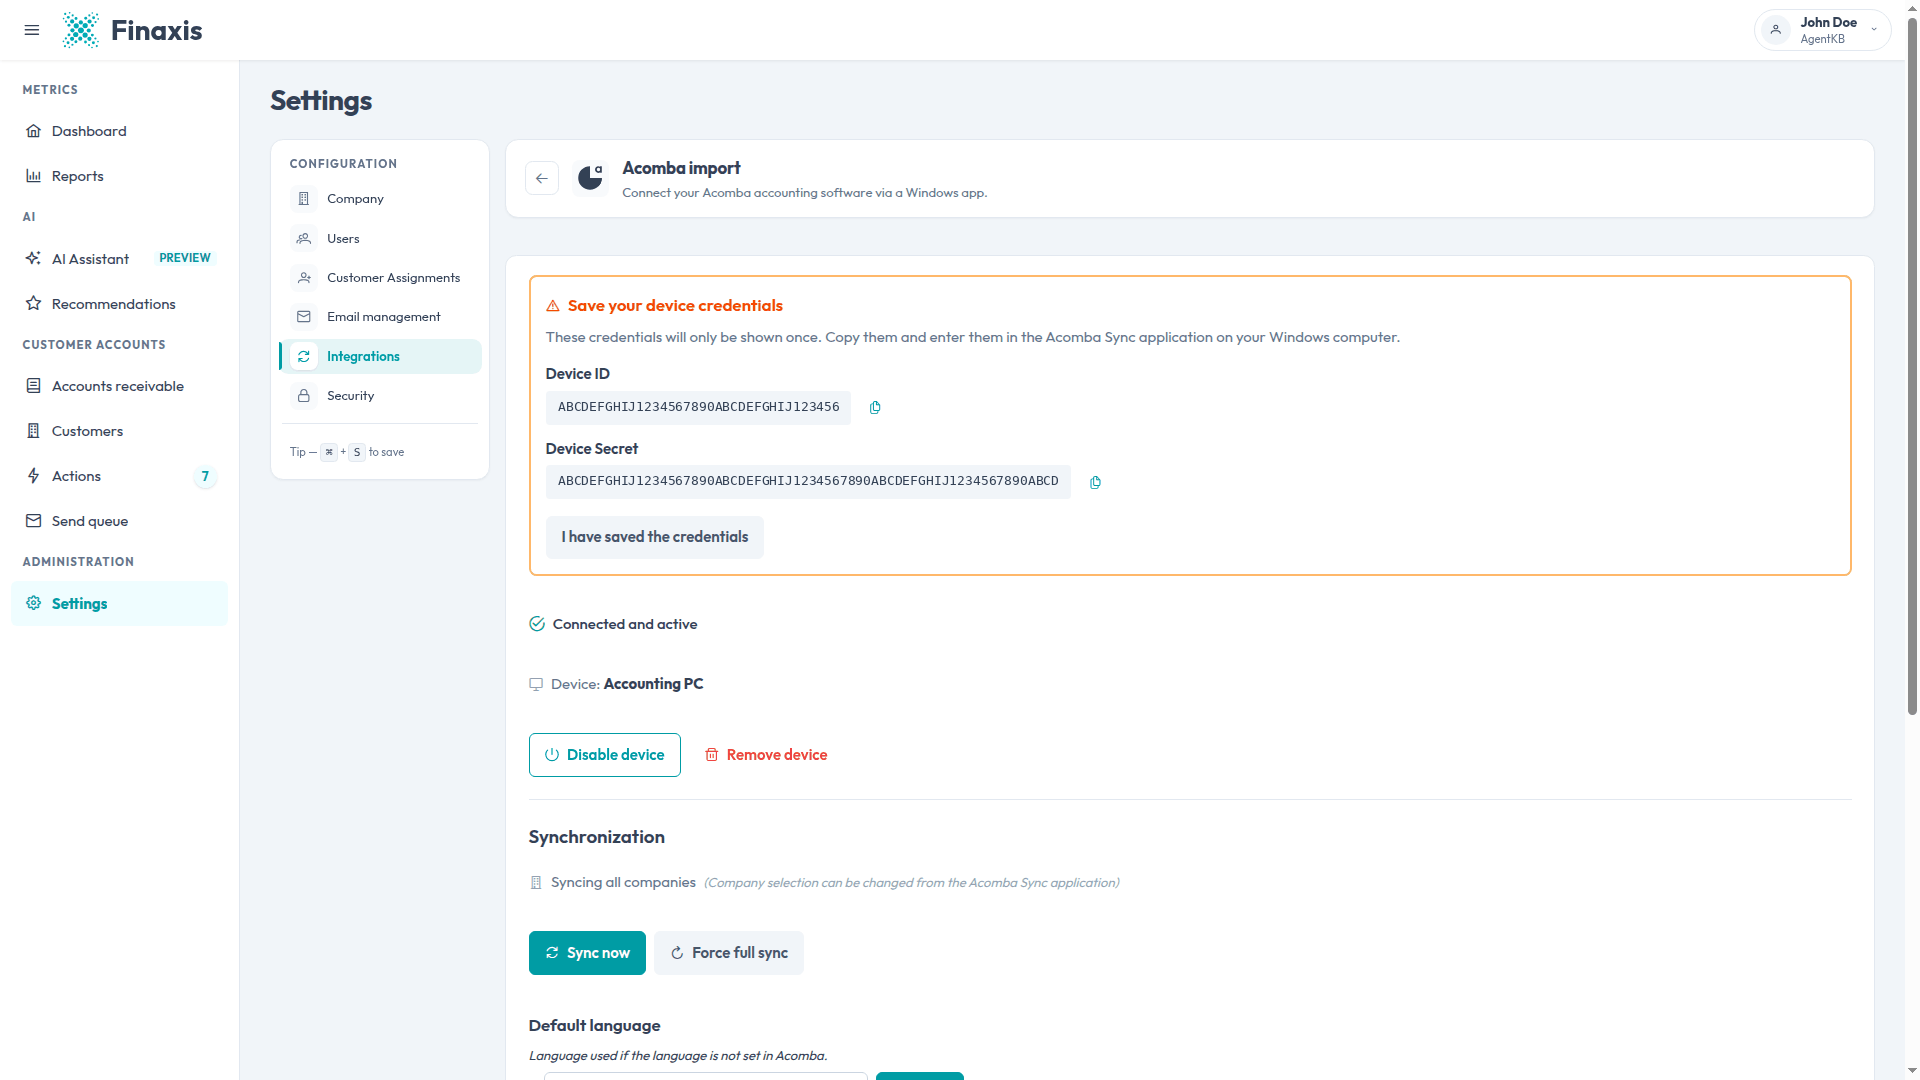
Finaxis generates a Device ID and a Device Secret. Together they link the Acomba Sync application to your Finaxis instance.
- Copy the Device ID and the Device Secret with the copy buttons and store them somewhere safe.
- Click I have saved the credentials to close the panel.
Please note: The credentials are shown only once. If you lose them, click Remove device and activate the integration again to get new ones.
Install the Acomba Sync application
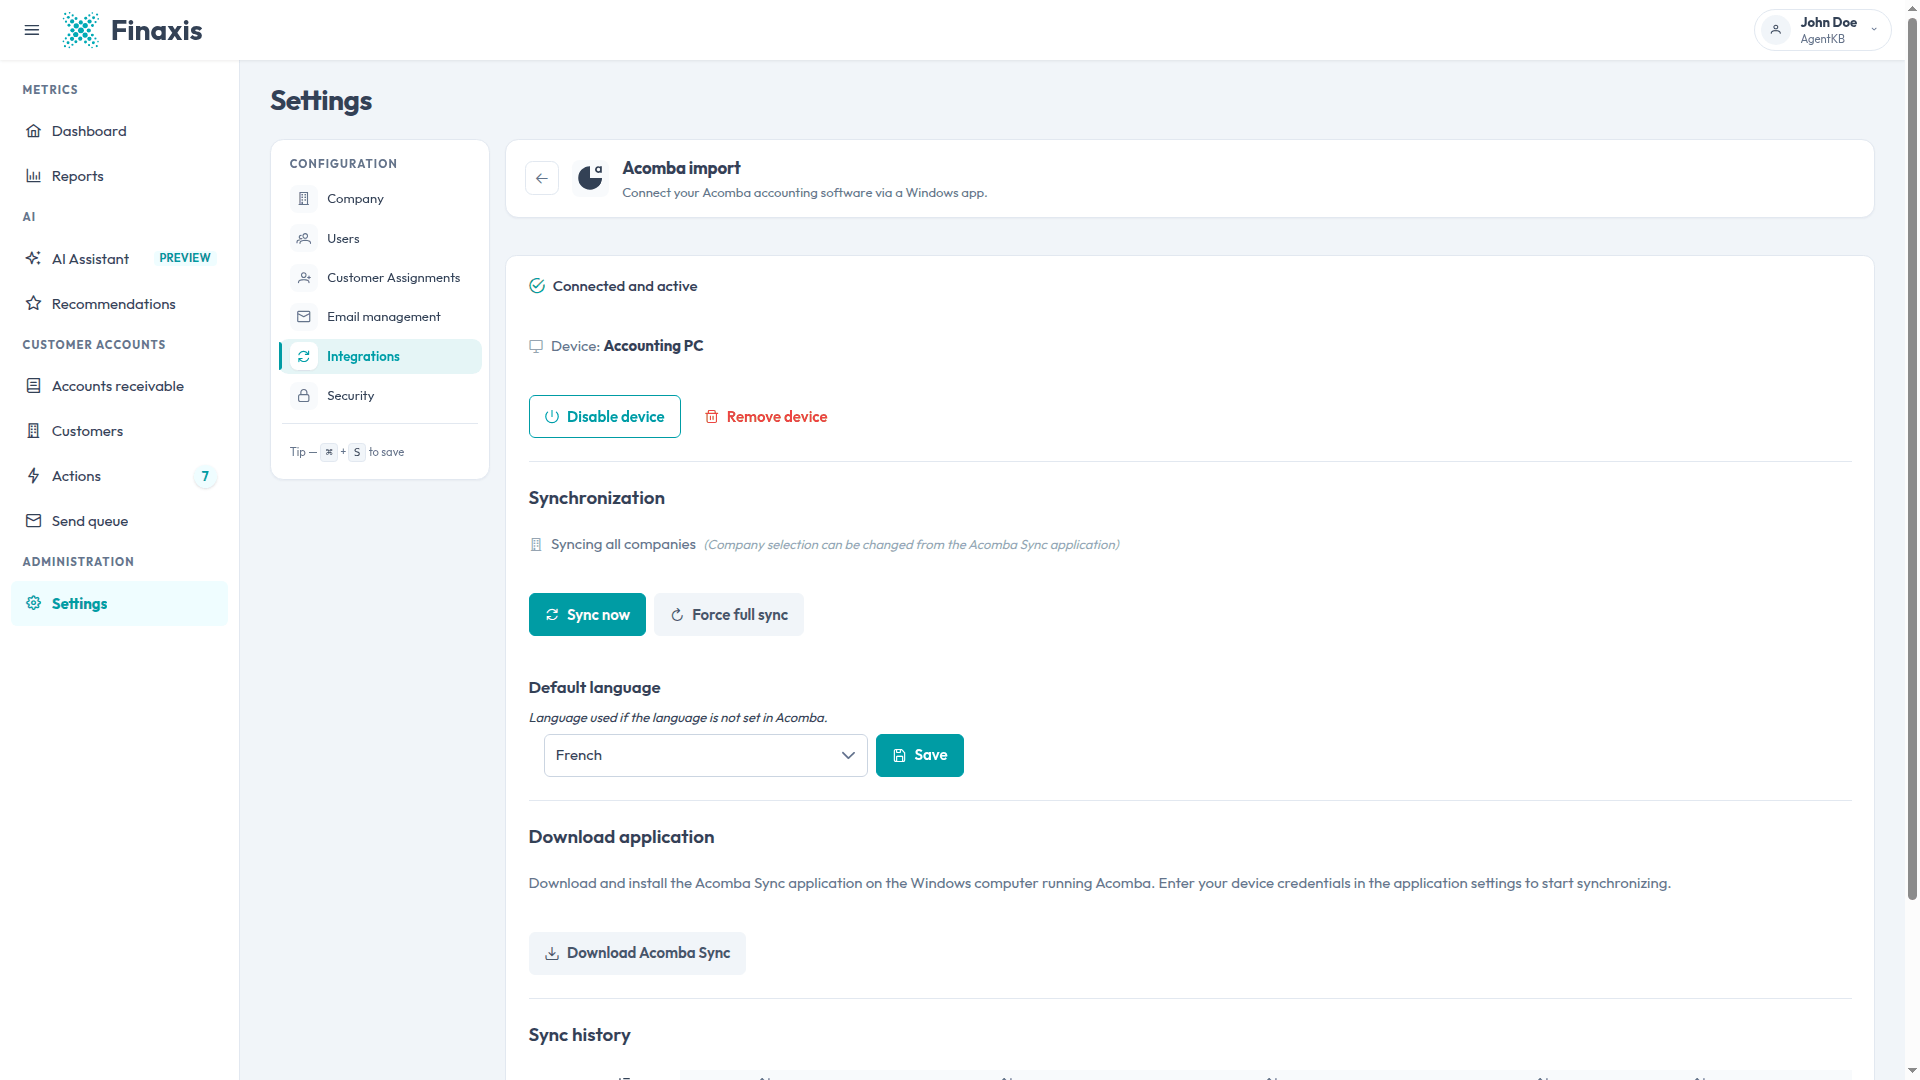
- In the Download application section, click Download Acomba Sync.
- Run the installer on the Windows computer where Acomba is installed. Windows administrator rights are required.
- Let the installation finish. Acomba Sync adds an icon to the notification area of the Windows taskbar and installs a background service that keeps synchronizing after a restart, even when nobody is logged in.
- Right-click the Acomba Sync icon, then click Settings to configure the connection.
Configure Acomba Sync on the Windows computer
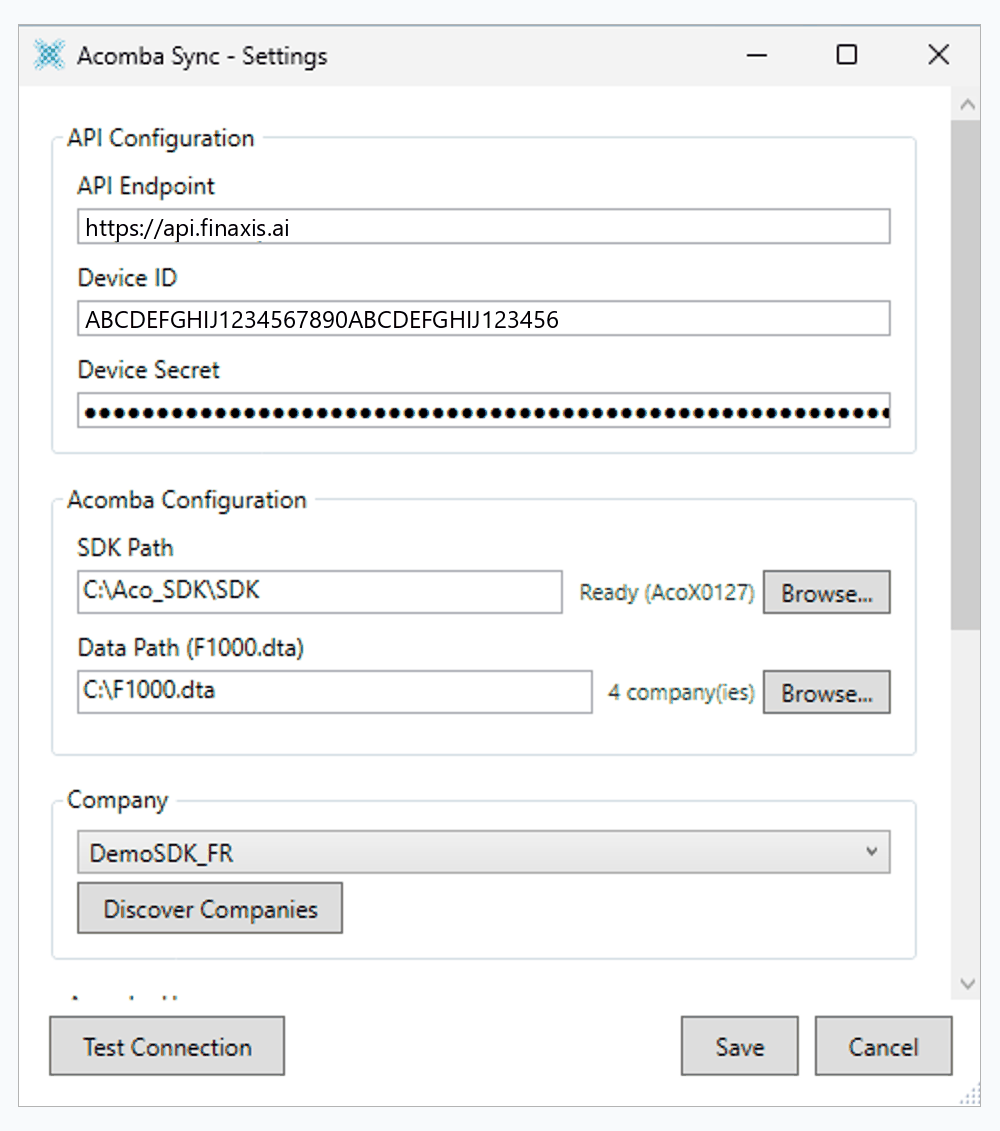
The Settings window links the application to your Finaxis instance, then to your Acomba data. Fill in the two groups from top to bottom.
- Leave API Endpoint on the address already filled in, https://api.finaxis.ai.
- Paste your Device ID and your Device Secret, the two values Finaxis showed you once.
- Check SDK Path. The application finds the Acomba SDK on its own and shows Ready in green. Click Browse to point at it yourself if it does not.
- Check Data Path (F1000.dta), the folder that holds your Acomba companies. It is C:\F1000.dta on a standard installation. The application shows how many companies it found.
- Under Company, pick the Acomba company to synchronize. Click Discover Companies to refresh the list after adding one.
- Further down the window, choose the Acomba user the application reads your data with, and enter its password.
- Click Test Connection. The test checks both the link to Finaxis and the opening of your Acomba company.
- Click Save. The application reconnects and starts the first import on its own. The Acomba page in Finaxis then shows Connected and active with your device name.
Please note: Changing the device credentials or the customer selection makes the next run a complete import. Changing the Acomba user or password does not.
Control synchronization from the Windows taskbar
Right-click the Acomba Sync icon in the notification area of the Windows taskbar to reach every command.
- Sync Now starts an import right away.
- Force Full Sync re-imports your complete Acomba data set.
- Settings opens the configuration window.
- View Logs opens the log window.
- About shows the installed version and checks for updates.
- Exit closes the window only. The background service keeps synchronizing.

Read the application logs
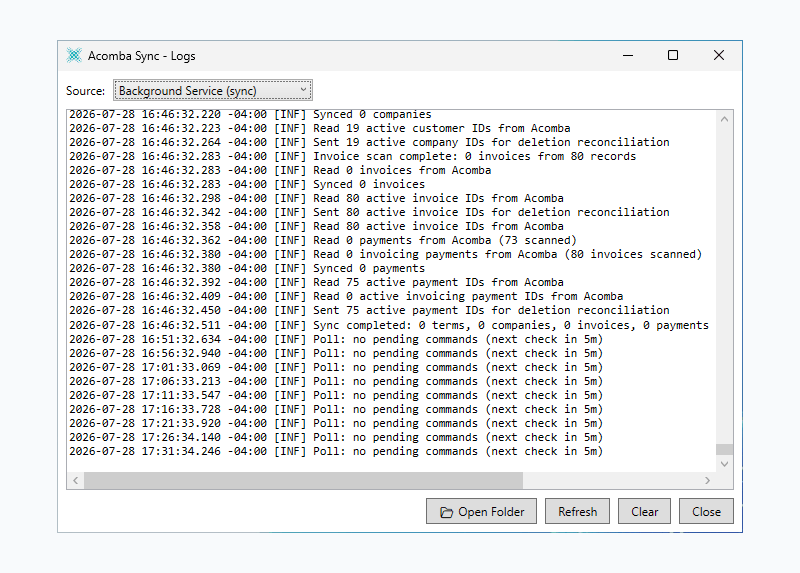
Click View Logs in the taskbar menu when a synchronization does not behave as expected. The window shows what the application did, line by line, with the newest lines at the bottom.
- Source picks the log you read. Background Service (sync) is the one that runs the imports.
- Refresh reloads the lines. Open Folder opens the folder holding the log files, handy when support asks you for them.
- A healthy service repeats a check line every five minutes and writes a completion line at the end of each import, with the number of records synchronized.
Install Acomba Sync on a server
Acomba Sync installs on the computer that reaches your Acomba data, which is often a Windows server rather than a workstation. It runs as a background Windows service under the system account, starts with Windows, and keeps synchronizing when nobody is logged in.
Please note: When Acomba or its data sits on a network share, fill the paths in with a full network address such as \\server\acomba\F1000.dta. A mapped drive letter such as Z: does not work: the service runs outside your Windows session and never sees the drives you connected there.
Keep the application up to date
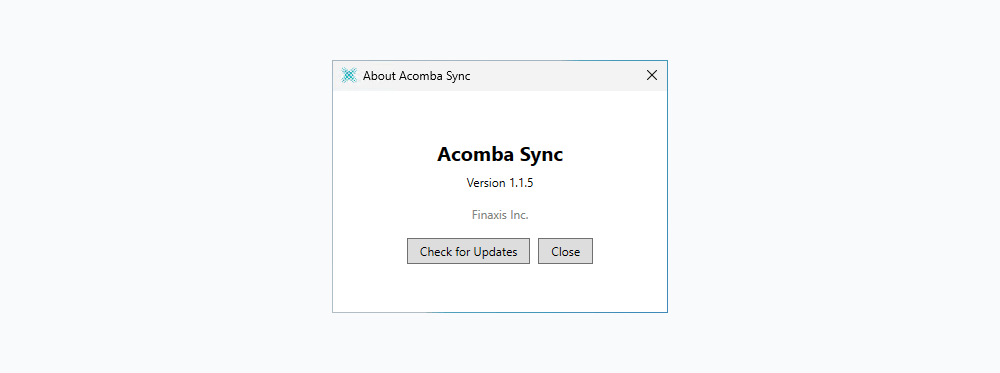
Acomba Sync updates itself. The background service checks for a new version, installs it, and resumes synchronizing. Click About in the taskbar menu to see the version you are running and to check right away with Check for Updates. The number shown changes as the application evolves.
Choose which customers to synchronize
The Acomba Sync application synchronizes one Acomba company file per Finaxis instance. In the Settings window of the application, you choose whether all customers or only a selection are imported; the Synchronization section of the Acomba page in Finaxis shows the current mode.
Please note: Switching from all customers to a selection removes the customers you left out, with their invoices, from Finaxis on the next synchronization. Add them back to the selection to restore them.
Run and monitor imports
The application checks in with Finaxis about every five minutes and imports your data every hour. The Sync history table shows each run with the number of customers, invoices, and payments synchronized.
- Sync now asks the application to start an import at its next check-in.
- Force full sync re-imports your complete Acomba data set.
- Default language sets the language Finaxis uses when a customer has no language set in Acomba.
Disable or remove the device
- Disable device pauses synchronization immediately. When you enable the device again, the application reconnects on its own; nothing needs to be re-entered.
- Remove device deletes the connection so you can register another computer. Everything already imported stays in Finaxis.
Please note: Only one computer can be connected at a time. To move Acomba Sync to a new computer, remove the current device, activate the integration again, and enter the new credentials in the application.
Troubleshoot the Acomba sync
| Situation | What to do |
|---|---|
| You lost the device credentials | They are shown only once. Click Remove device, activate the integration again, and enter the new credentials in the Acomba Sync application. |
| Sync now seems to do nothing | The import starts at the application's next check-in, about every five minutes, and only while the Windows computer is on. The history refreshes on its own once the run starts. On the computer itself, Sync Now in the taskbar menu starts it immediately. |
| Your data looks out of date | Imports run every hour while the computer is on. A computer that was off catches up as soon as it starts. Click Sync now to refresh right away. |
| Customers are missing after changing the selection | Only selected customers stay in Finaxis. Reopen the selection in the Acomba Sync application, add the missing customers, and synchronize again. |
| Data looks incomplete or wrong | Click Force full sync: the complete data set is re-imported at the next check-in. If the problem persists, contact support. |
| A customer receives follow-ups in the wrong language | Set the customer's language in Acomba, or adjust the Default language on the Acomba page. |
| Test Connection fails | Check the Device ID and the Device Secret against the values Finaxis gave you, and confirm the computer reaches the internet. If the Acomba side is what fails, check the Data Path along with the Acomba user and password. |
| SDK Path never shows Ready | Click Browse and point at the Acomba SDK folder on that computer. If the status does not change, contact support. |
| The icon disappeared from the Windows taskbar | Exit only closed the window; synchronization carried on in the background. Open Acomba Sync again from Windows to bring the icon back. |
Need a hand with your Acomba connection? Write to [email protected] and our team will help you.
Related articles
Can't find what you're looking for?
Our support team is here to help.